How to Install Hyper-V Core: Step-By-Step Guide
What’s involved in building a Hyper-V virtual environment? First and foremost, you need a reliable and efficient Hyper-V host on which your guest VMs will run. In today’s blog post, we are going to discuss whether Hyper-V Core 2012 R2 should be used as a Hyper-V host and which steps are included in the Hyper-V Core installation process.

In short, the pros and cons of Hyper-V Core can be summarized in the following way:
Pros:
- Hyper-V Core is free.
- Hyper-V Core can be used for running Linux VMs which don’t require licensing.
- The computer running Hyper-V Core can be managed remotely using a GUI tool (e.g. Hyper-V Manager, Server Manager, System Center Virtual Machine Manager, etc.).
- Hyper-V failover clustering is supported.
- Hyper-V Core takes up less disk space and uses less memory than Windows Server.
- Hyper-V Core has a small footprint because only the core components are installed, meaning that less patching and servicing is required.
- Hyper-V Core has a small surface attack, meaning that it is less vulnerable than Windows Server.
Cons:
- Hyper-V Core has a command line interface (CLI) only. Even though Hyper-V Core doesn’t require any licensing, you must purchase separate licenses for guest VMs running Windows operating systems (OSes).
- Hyper-V Core provides limited software and hardware support.
- The use of other server roles is prohibited.
What Is Hyper-V Server?
Hyper-V is a Microsoft hypervisor which allows you to create, configure, and delete virtual machines (VMs). Hyper-V has been available as a free server role since the release of Windows Server 2008. Apart from the Hyper-V role, Microsoft has introduced Hyper-V Core (also known as Hyper-V Server) as a standalone product which contains only the Windows hypervisor, a Windows Server driver model, and virtualization components.
While Hyper-V Core does not feature various server roles and components which can be easily enabled in Windows Server, this is not of utmost importance as its main purpose is to enable server virtualization, consolidate various workloads, and reduce footprint and overhead costs.
Prerequisites for Hyper-V Core Installation
Before we can start Hyper-V Core installation, you first need to review Microsoft Hyper-V Core system requirements. If your computer doesn’t support these basic requirements, you will not be able to install Hyper-V Core correctly. Note that Hyper-V Core has hardware requirements that are similar to those needed for the Hyper-V role enabled in other editions of Windows Server.
In general, minimum requirements for Hyper-V Core installation include:
- A 1.4 GHz 64-bit processor with hardware-assisted virtualization (Intel VT or AMD-V)
- Hardware-enforced Data Execution Prevention (DEP), using the Intel XD bit or the AMD NX bit
- Minimum 512 MB of RAM
- Second Level Address Translation (SLAT)
- VM Monitor Mode extensions
How to Install Hyper-V 2012 R2 Core
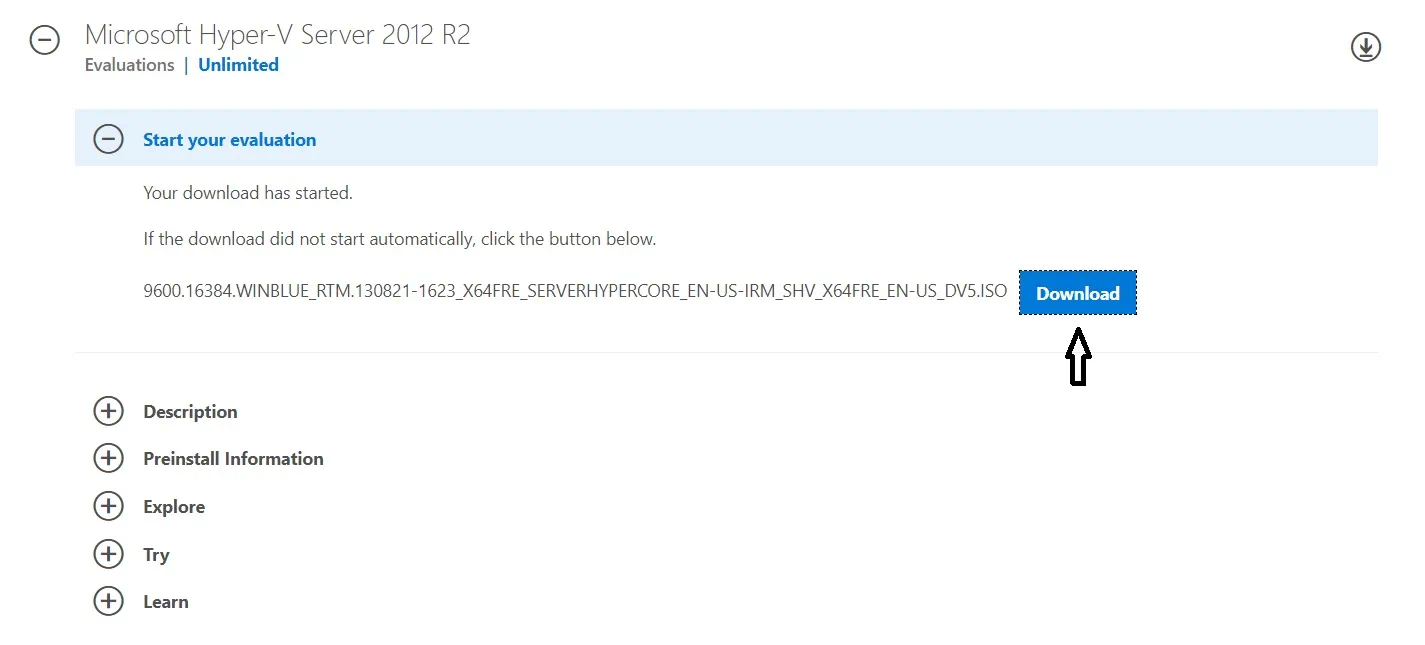
After checking for Hyper-V Server requirements, you can go to the Microsoft Evaluation Center, register, and download the installation file. In this blog post, we are going to demonstrate how to install Hyper-V 2012 R2 Core.
To conduct the Hyper-V Core installation operation, we need to take the following steps:
1. Download the ISO file.
2. Burn the previously-downloaded ISO file to a DVD or USB and boot from it.
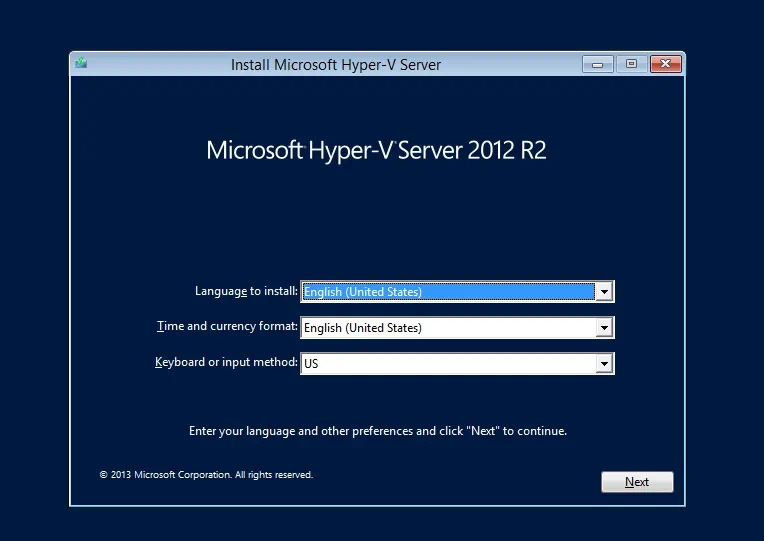
3. Select Language, Time and currency format, and Keyboard or input method.
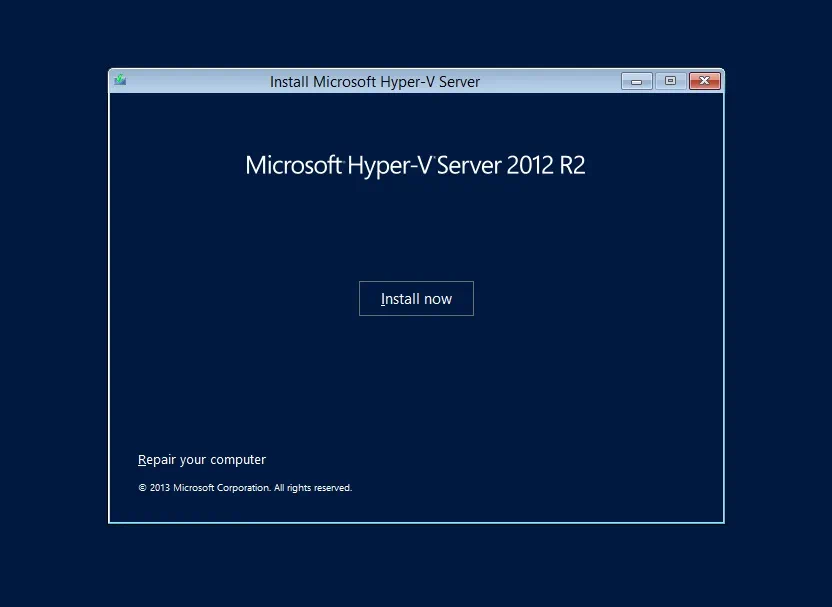
4. Click the Install now button.
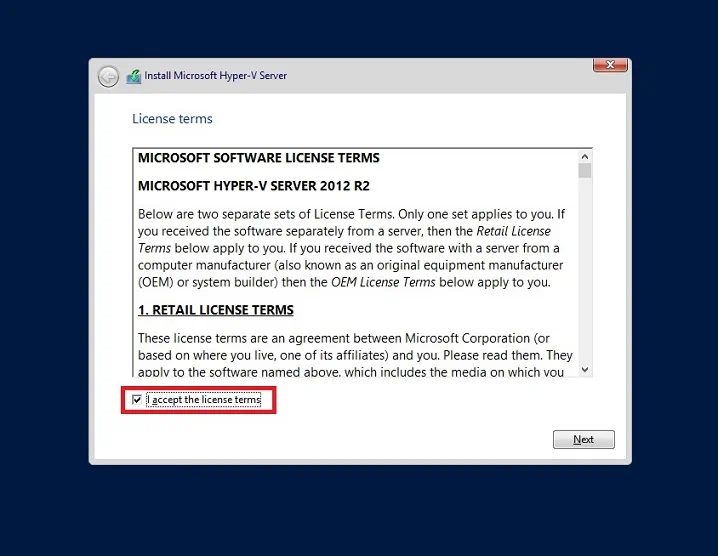
5. Read the license agreement and then check the box I accept the license terms
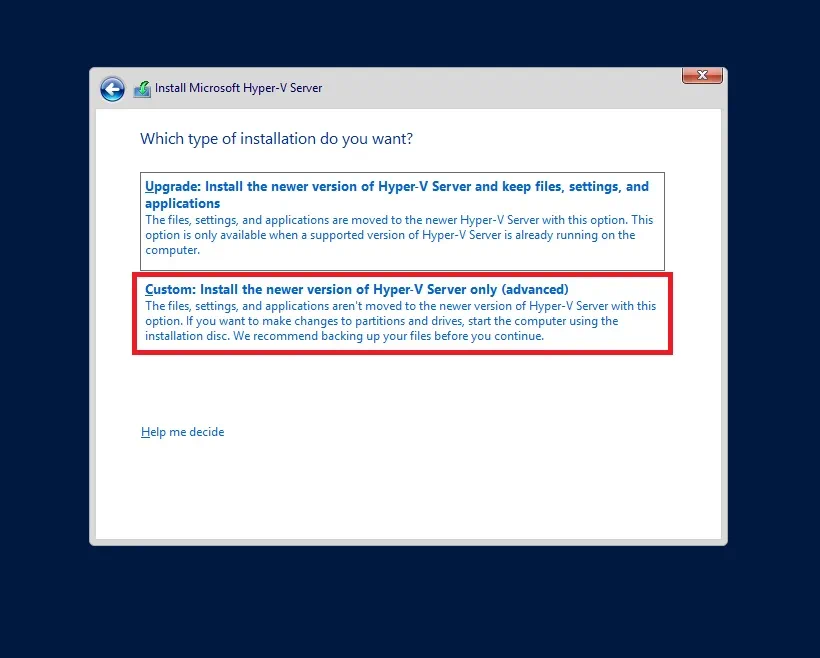
6. Select the type of installation you need. For a clean installation, click Custom: Install the newer version of Hyper-V only (advanced).
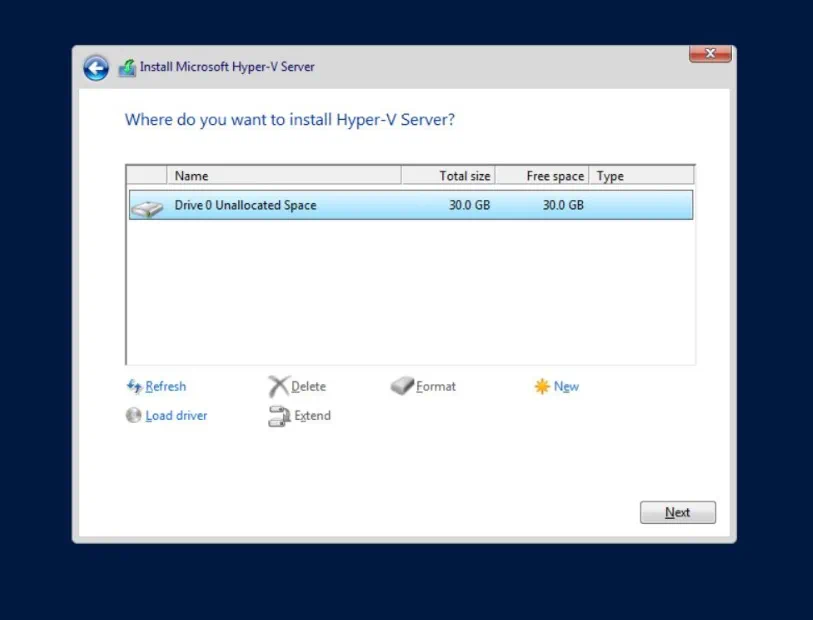
7. Choose the disk where Hyper-V Server needs to be installed.
8. Hyper-V Core installation will start, during which the computer will restart several times.
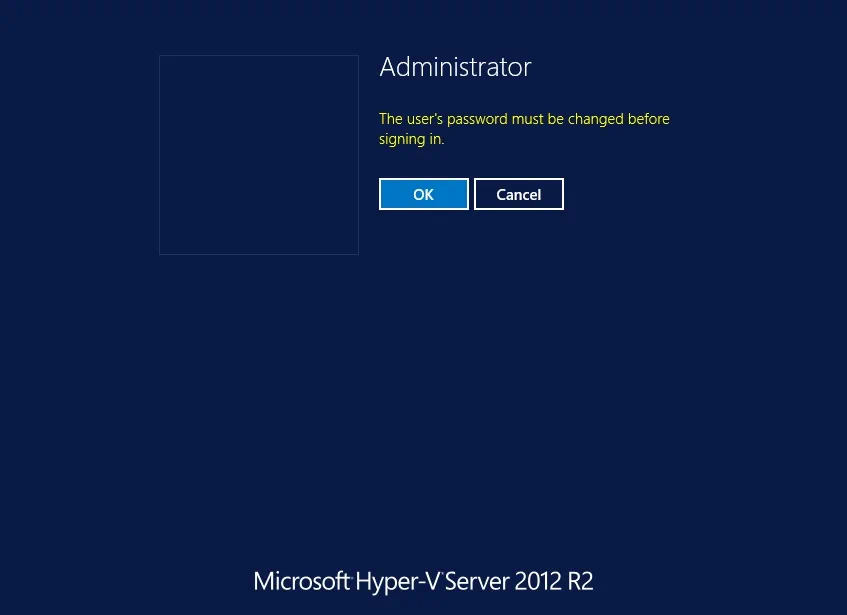
9. After the system reboot, you will be asked to enter a new user’s password and confirm it before signing in.
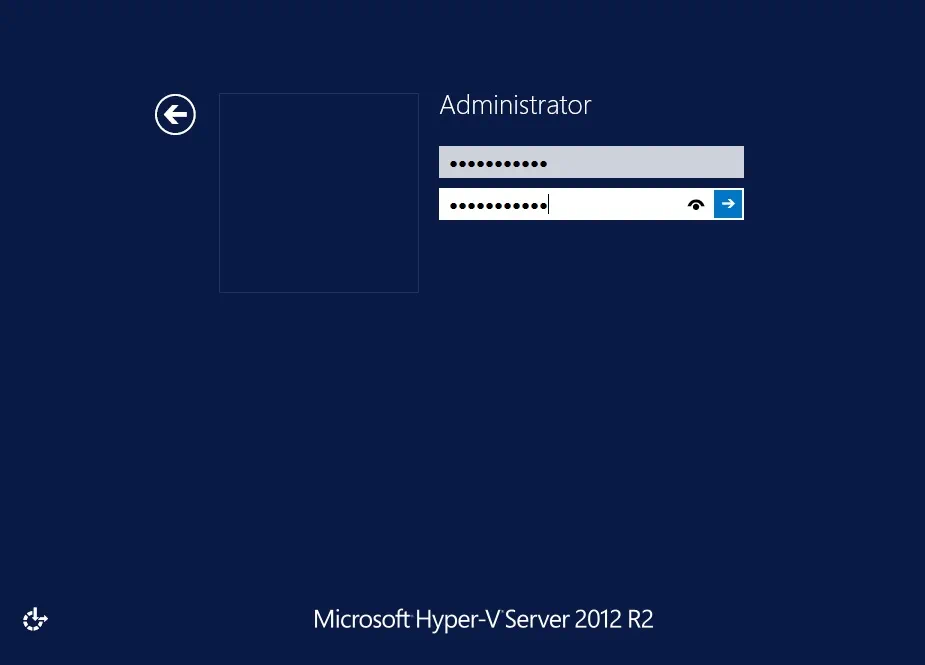
10. Type and confirm the new password and press Enter.
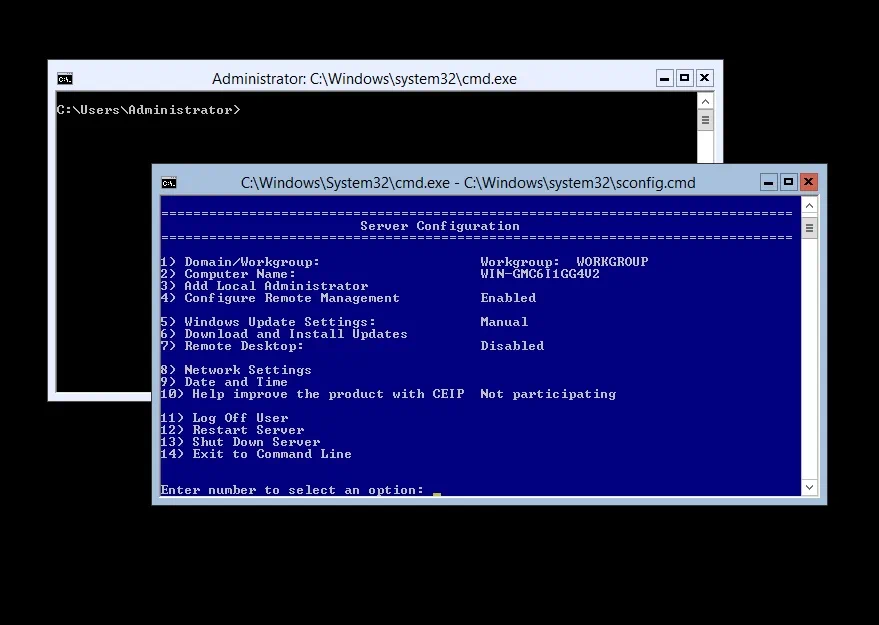
11. Hyper-V Core is ready for use and doesn’t require any additional configurations. The Command Prompt as well as the Server Configuration tool (Sconfig.cmd) will automatically open.
What to Do After Hyper-V Core Installation
Once the Hyper-V Core installation is complete, you can start configuring your virtual environment using Sconfig tool. However, for operations which can’t be performed with Sconfig tool, you can use an ordinary command prompt (the Administrator mode should be enabled). Server configuration options available in the Sconfig menu include:
- Join Domain or Workgroup
- Change the computer name
- Add user to the local administrator group
- Enable or disable Remote Management
- Set Windows Updates to Manual or Automatic mode
- Conduct Windows Updates
- Enable or disable Remote Desktop
- Set Network Adapter Address
- Set DNS Servers
- Change date and time
- Log off the user
- Restart Hyper-V Server
- Shut down Hyper-V Server
Most of these configuration options can be easily set if you follow the prompts. In our blog post, we wish to focus on how to configure some of these options.
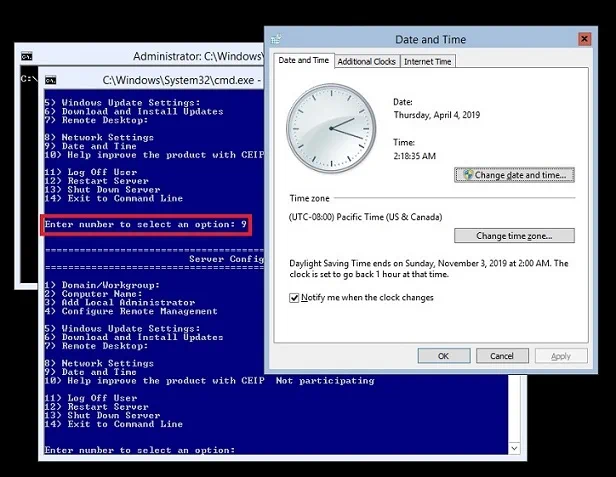
Change the date and time
In the Sconfig menu, type 9 and press Enter, which will open the Date and Time wizard. Make the required changes.
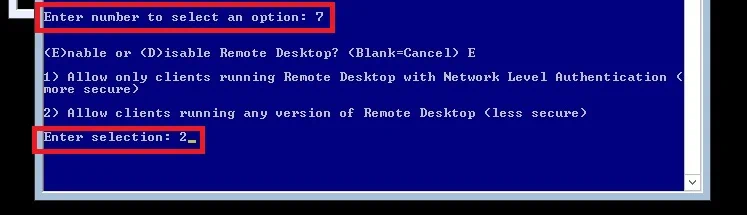
Enable Remote Desktop
Enter 7 to select the Remote Desktop option. Here, you can either enable or disable remote desktop. Type E to enable Remote Desktop, then select the ‘Less Secure’ option, which allows connections from computers running any version of Remote Desktop.
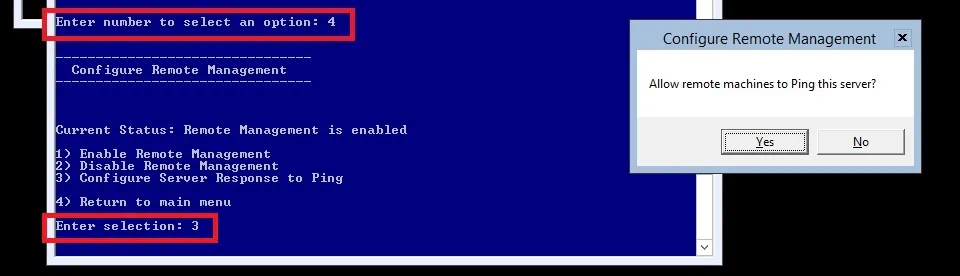
Configure Remote Management
The option ‘Configure Remote Management’ is typically enabled by default. By selecting the option 4, the Remote Management menu will open. Here, you can either enable or disable Remote Management by selecting the corresponding number (1 or 2). However, server response to pings is not enabled by default. Thus, select the option 3 if you want to allow remote machines to ping this server.
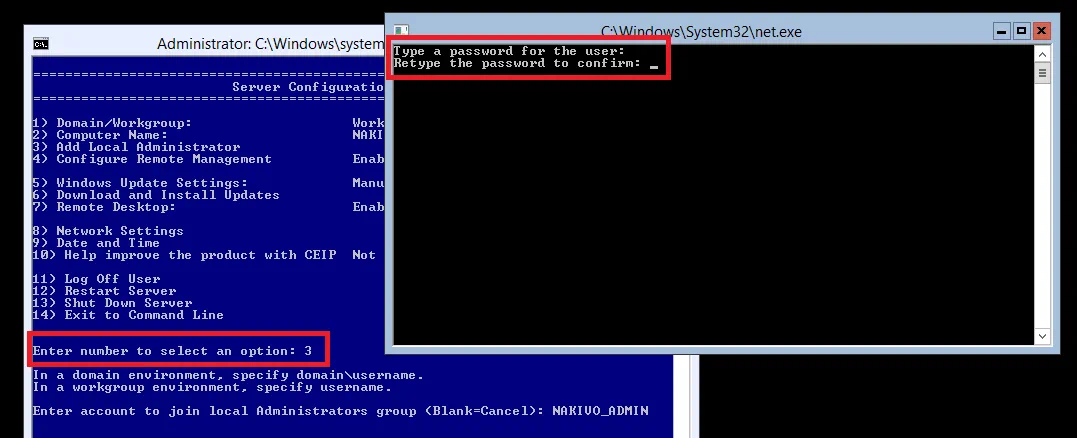
Add local administrator account
As the next step, you can create a new user account to join the local Administrators group. Note that the created username and password need to be the same as those of the account you are going to use on the client computer when managing Hyper-V Server remotely.
In this case, select option 3 and specify the username. After that, you will be asked to create a password for this user and confirm the password by retyping it.
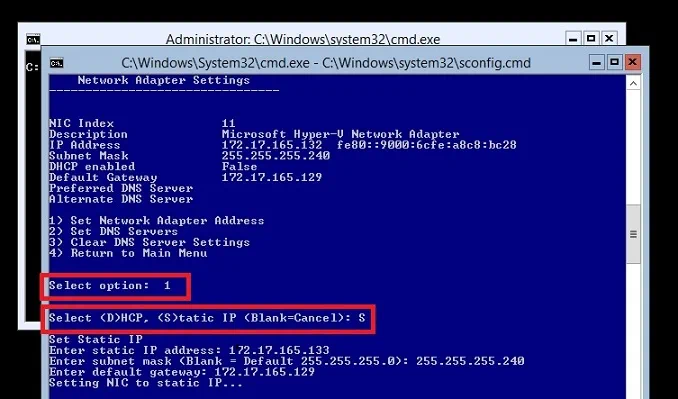
Configure network settings
The next step is extremely critical for enabling remote management of Hyper-V Core. For this purpose, select option 8, then choose the required network adapter from the list of available adapters (11 in our case), look through the network adapter characteristics, and choose option 1. After that, type S in order to set the static IP address. Next, you will be asked to type the static IP address, subnet mask, and default gateway.
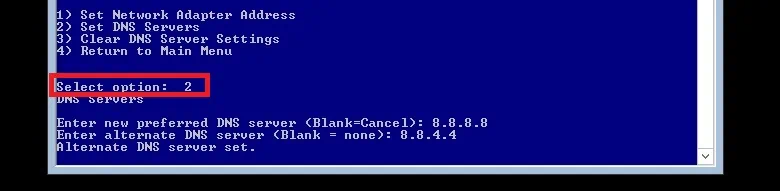
Moreover, you need to set DNS servers to ensure network connectivity. Select option 2 and enter the preferred and alternate DNS server addresses. Here you can use any DNS server you want. For example, you can apply freely available Google Public DNS addresses (8.8.8.8 and 8.8.4.4).
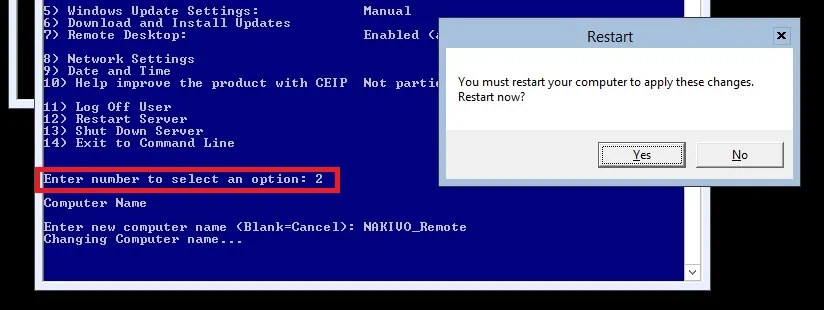
Set the computer name
Another configuration option is to change the computer name. For this purpose, select option 2 and enter the new computer name. After that, you will be asked to restart the computer in order to save the changes.
After the system has rebooted, you can connect to Hyper-V Core 2012 R2 from another computer using Hyper-V Manager or Server Manager and start managing the Hyper-V host remotely.
Data Protection with NAKIVO
Whether you are new to using a Hyper-V environment or have a lot of experience with it, you still need to ensure that your Hyper-V environment is securely protected. In this case, you must find an efficient data protection solution which can shield your virtual infrastructure from any unexpected disasters and minimize their possible repercussions.
NAKIVO Backup & Replication is the solution which can provide you with multiple data protection options and even more unique features. NAKIVO Backup & Replication can protect your Hyper-V environment in a cost-effective and reliable manner, regardless of which Hyper-V deployment option is running in your environment.


