How to Perform Physical Server Backup: Complete Guide
Physical servers are important components of every IT infrastructure in offices and datacenters. Servers host applications, run essential services and store critical data. It is important to back up servers to enable full data recovery either by booting the server or restoring particular files if minor data loss incidents occur. This blog post explains how to perform physical server backup effectively to enable multiple recovery options.
Physical Server Backup: Methods and Comparisons
There are multiple methods for backing up physical servers. These methods can be classified based on the backup method, backup location or other parameters. Below are some methods based on how the data is copied.
File backup
The simplest method for physical server data backup is copying the files on that server. This method is easy to use but has significant disadvantages. If files are opened by applications and data is written to these files, the files cannot be copied properly and copied data may be inconsistent, complicating recovery. On the other hand, file-level backup can be used when you don’t need to back up the OS, applications or system state, as creating a full backup each time requires more time and disk space.
Using scripts
Scripts can be used to back up files from physical servers. Backup scripts can be used to automate the backup process and to freeze the writing activities for the copied files. This approach can make file backups consistent. There are disadvantages of using scripts for physical server backup:
- Creating scripts is not an easy process
- Full recovery of a server with the ability to boot it requires complex manual operations
- Incremental backups are usually not available, which leads to high storage consumption.
Using image-based backups
Image-based backup made with special backup software is the most effective option for a full server backup when protecting data on physical servers and workstations. There are offline and online methods to back up a physical machine using a professional backup application.
- Booting from a live medium to back up the entire server when the server is offline. There is no need to install any backup software on the physical machine in this case and backup data is consistent because there are no running applications that open files and write data to files during the backup process.
- Installing a backup agent on the operating system running on the physical server or workstation. In this case, there is no need to interrupt a running server to back up consistent data. A special application called a backup agent is used to freeze writing operations initiated by running applications during the backup job to create a consistent data copy.
Image-based backups are created by using special data protection software that supports change tracking and incremental with full backups for effective backup storage use and faster backup time.
Read more about full backups and incremental backups.
Classifying server backups by destination
Physical server backups can be classified based on the backup destination. This classification is applicable for both physical and virtual machine backups.
- Backup to local storage. This backup type is one of the on-premises backups where the data is usually backed up to hard disk drives on a backup server. However, hard disk drives with backups can be disconnected and moved to another physical location. Disconnected hard disk drives with backups can be used as air-gapped backups for ransomware protection and other threats.
- Backup to tape. Tape is one of the oldest backup media types. Data is recorded sequentially, which is a disadvantage, but the reliability and price of tape cartridges are significant advantages for various organizations. Tape backups can be transferred to another physical location and are resistant to ransomware. Tape media is applicable for long-term archival that can be necessary for regulatory compliance for organizations working in certain industries.
- Backup to cloud. Public cloud is a highly scalable storage type that is available on a subscription basis and can be used with a pay-as-you-go charging model. An internet connection is required to copy backup data to the public cloud and the connection speed can be a bottleneck. For this reason, a common strategy is backing up data on local storage and then sending a backup copy to the cloud. Public cloud storage can support immutability. Object storage, such as AWS S3, Wasabi and other S3-compatible cloud storage support data immutability.
By using the 3-2-1 backup rule and storing backups in multiple locations, you can implement a reliable server backup strategy.
Physical vs. Virtual Server Backup
Installing a backup agent on a physical machine is the recommended practice to back up a running machine without interruption. This approach is called “agent-based backup” and provides a set of advantages for physical server backup, such as consistent backups, incremental backups, etc. When it comes to backing up virtual machines, agent-based backup is not the recommended method and is the legacy approach (also known as guest-level backup).
Virtual machines run on a hypervisor, which is also called a virtualization host. A hypervisor supports a set of APIs to back up VMs at the host level without installing an agent on the guest operating system of a VM. Only special drivers and utilities of the virtualization vendor (such as VMware Tools) must be installed on the guest OS of a VM to freeze the VM state using the snapshot functionality when applications write data to open files. A host-level backup, which is also the image-level backup, is the best method for VM backup.
How to Back Up a Physical Server with NAKIVO: A Step-by-Step Guide
NAKIVO Backup & Replication is a data protection solution that can back up physical and virtual machines to different locations, including local and cloud storage. The NAKIVO solution allows you to quickly perform a physical server backup..
You need to configure the environment before you run a physical server backup. The preparation step requires a few quick actions, such as adding the physical machine to the inventory. Ensure that you have a backup repository where you can store your physical server backup.
NOTE: When installing the full NAKIVO Backup & Replication solution, the Onboard Backup Repository is present by default. You can add more backup repositories in different locations to store backups and backup copies.
Adding a physical machine to the inventory
You need to add the physical server to the inventory before you can back it up. Similarly, you can add workstations if you want to run a backup of physical servers and workstations.
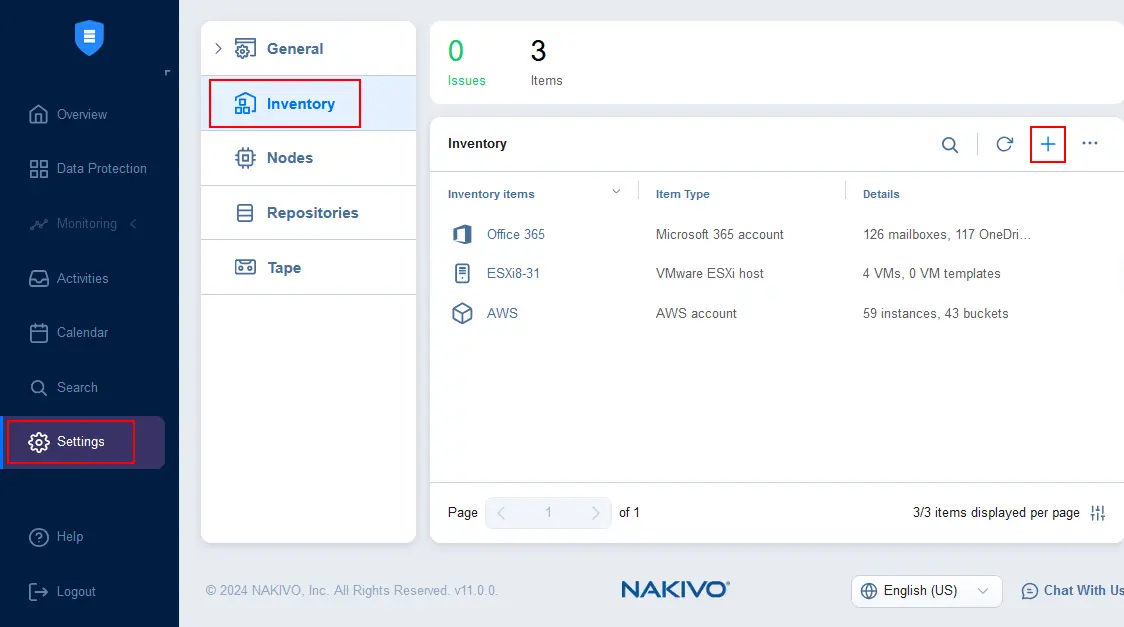
- Open the web interface of NAKIVO Backup & Replication and go to Settings > Inventory. Click + to add a new item to the inventory.
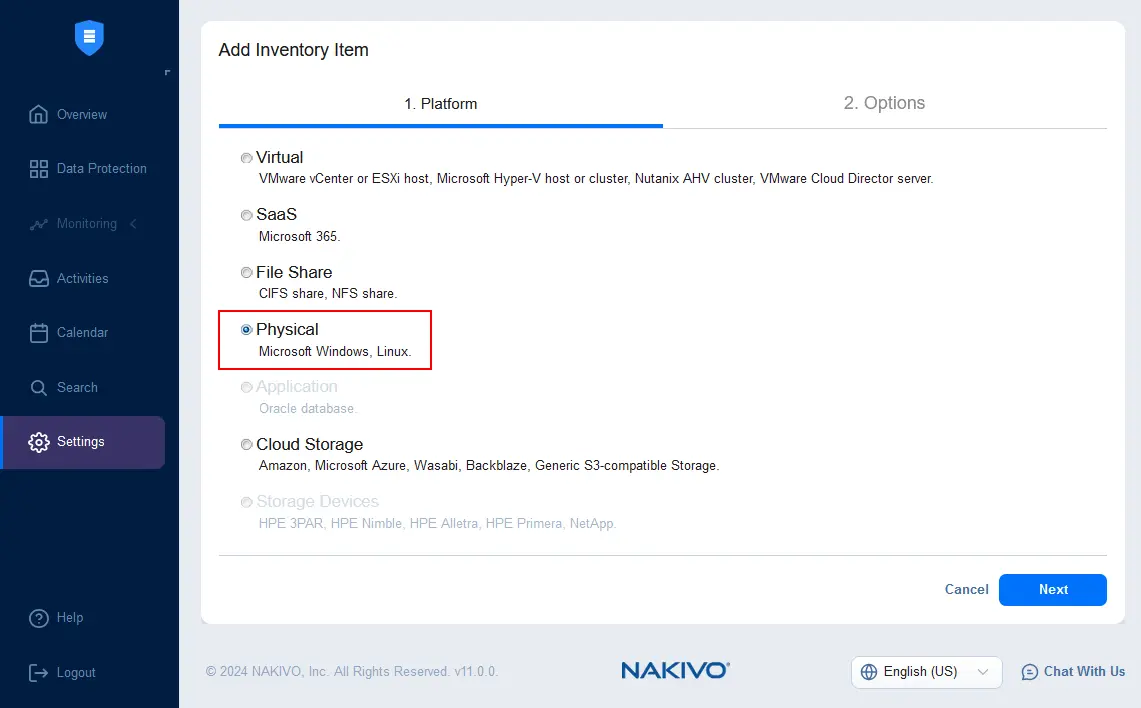
- At the Platform step of the Add Inventory Item wizard, select Physical to add a physical Windows or Linux machine. Hit Next at each step to continue.
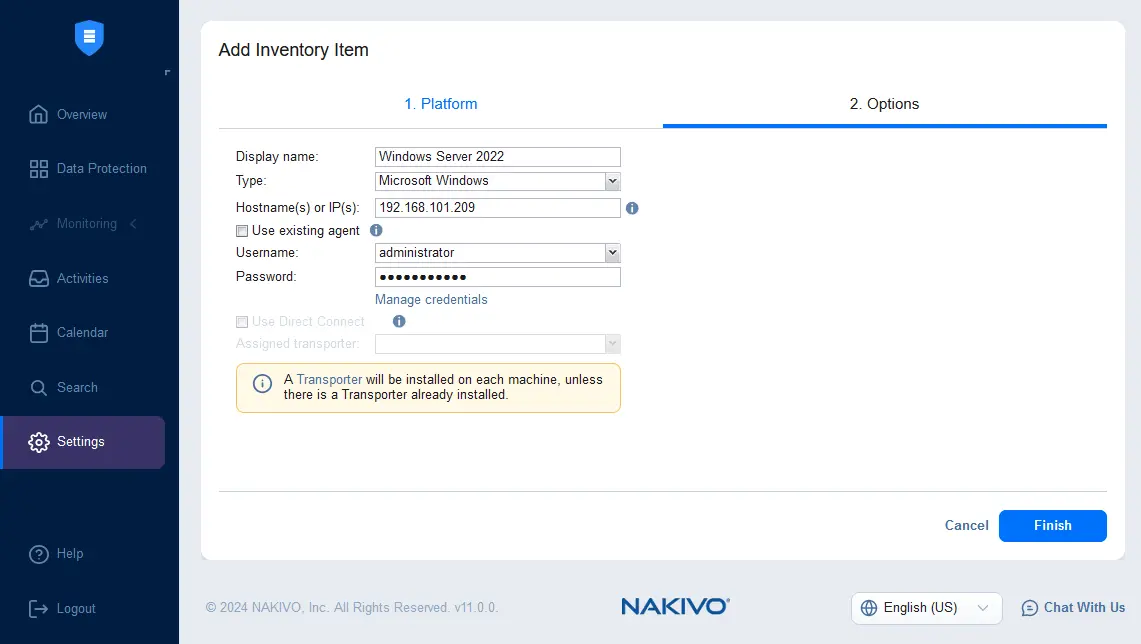
- Specify the required options to add a physical machine to the inventory. In this example, we configure a physical server backup of Windows Server 2022 and we enter the following parameters:
- Display name: Windows Server 2022
- Type: Microsoft Windows
- Hostname or IP address: 192.168.101.209
Enter the credentials (username and password) for the administrative account to have enough permissions to install the Transporter agent on the selected physical machine. Optionally, you can use the existing agent if you installed it on the physical machine manually.
Click Finish to save these settings and finish adding the physical machine to the inventory.
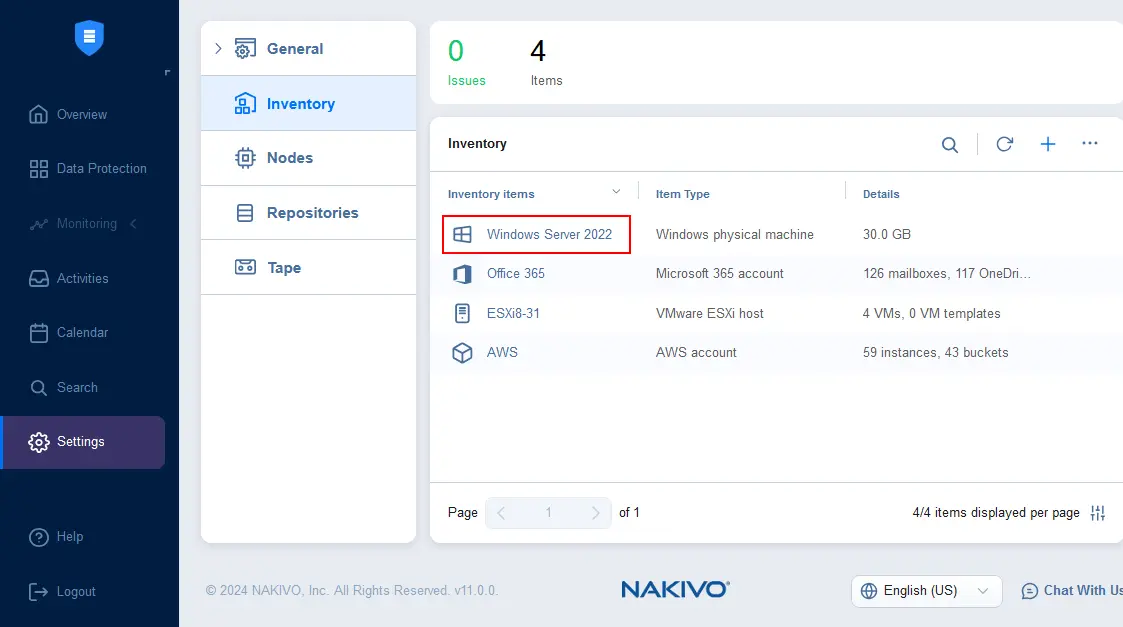
- The physical server has been added to the NAKIVO inventory. Now, we can see Windows Server 2022 in the list.
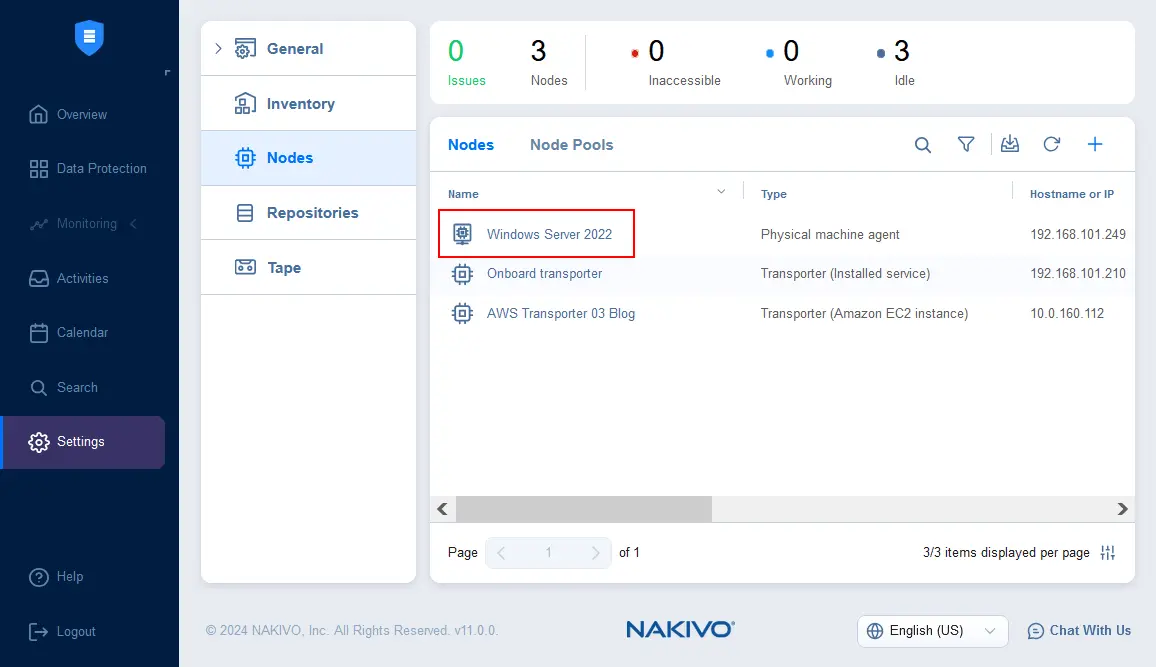
- A Transporter agent has been installed on our physical Windows Server 2022 machine. We can check that the agent is installed in Settings > Nodes.
The NAKIVO Backup & Replication Transporter is deployed and running on the physical Windows Server.
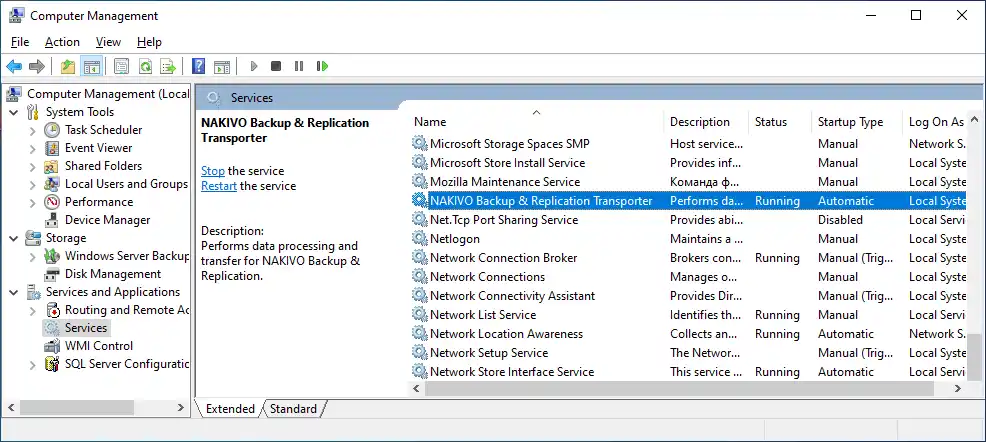
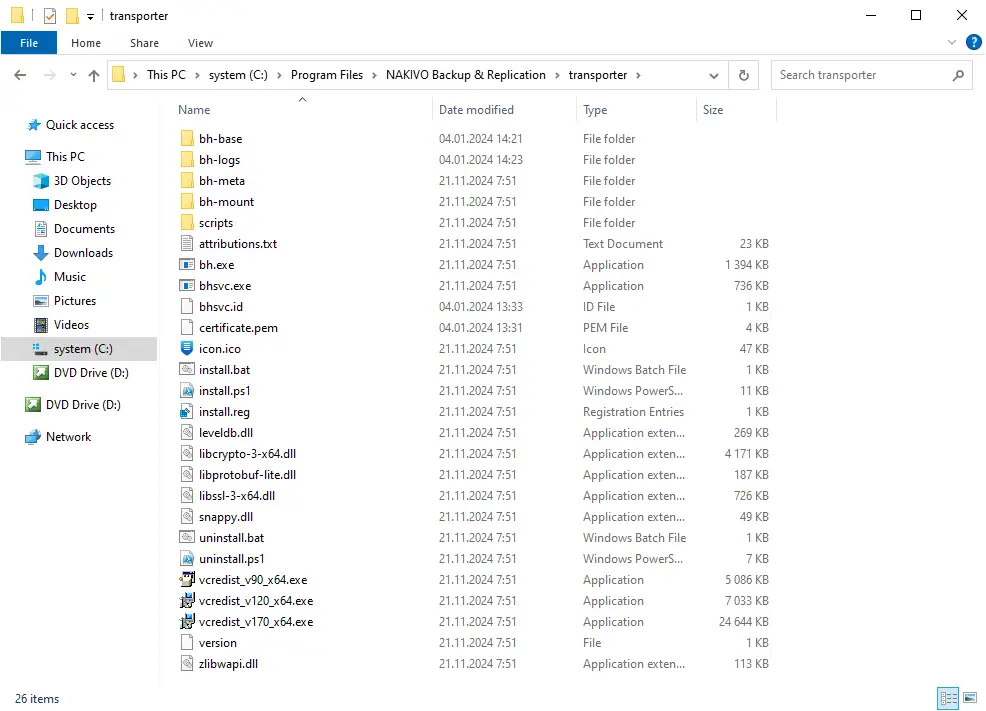
The files of the installed NAKIVO Transporter agent for the physical machine are stored in C:\Program Files\NAKIVO Backup & Replication\transporter on the Windows machine by default.
You can also watch this video for a detailed walkthrough for adding a physical machine to NAKIVO Backup & Replication:
Creating a physical server backup job
Once the physical server has been added to the NAKIVO inventory, we can configure a physical server backup job. In this example, we will back up the physical machine running Windows Server 2022.
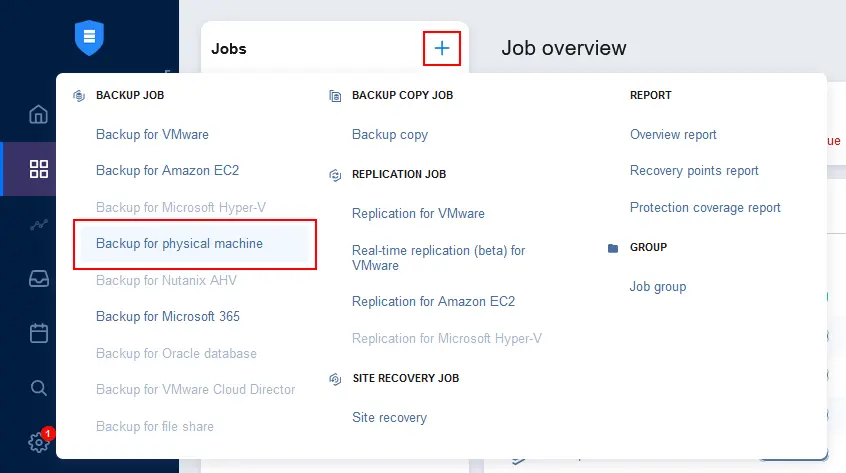
- Go to Data Protection, click + and hit Backup for physical machine to create a new backup job.
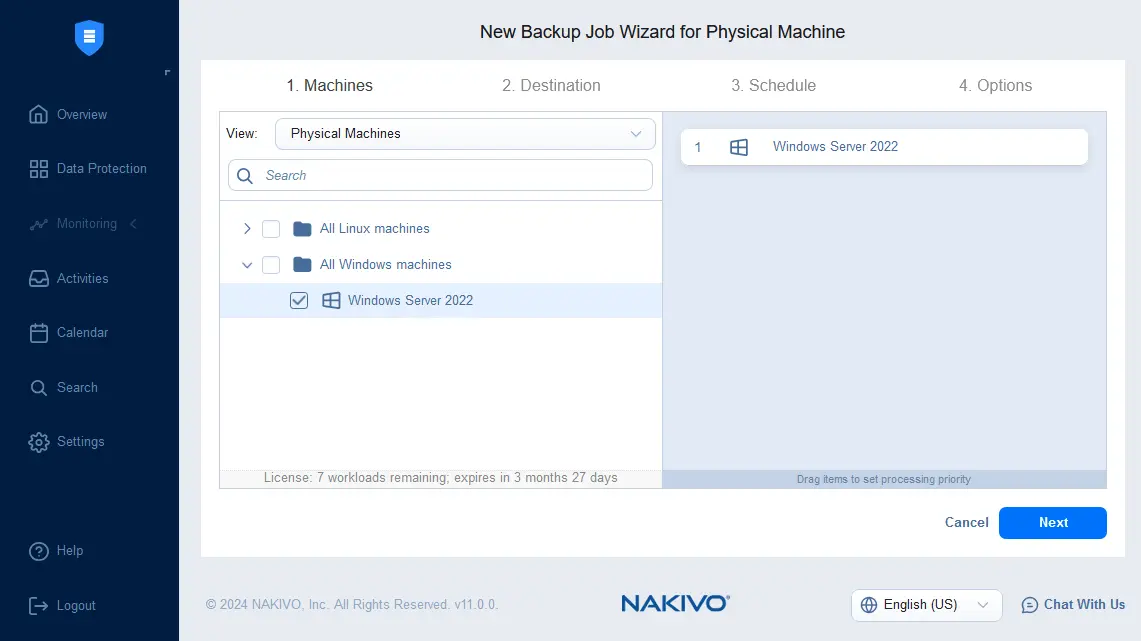
- A new backup job wizard for physical machines is opened. Select the needed physical server. You can run a single backup job to back up multiple Windows and Linux machines. We selected the Windows Server 2022 machine. Hit Next to continue.
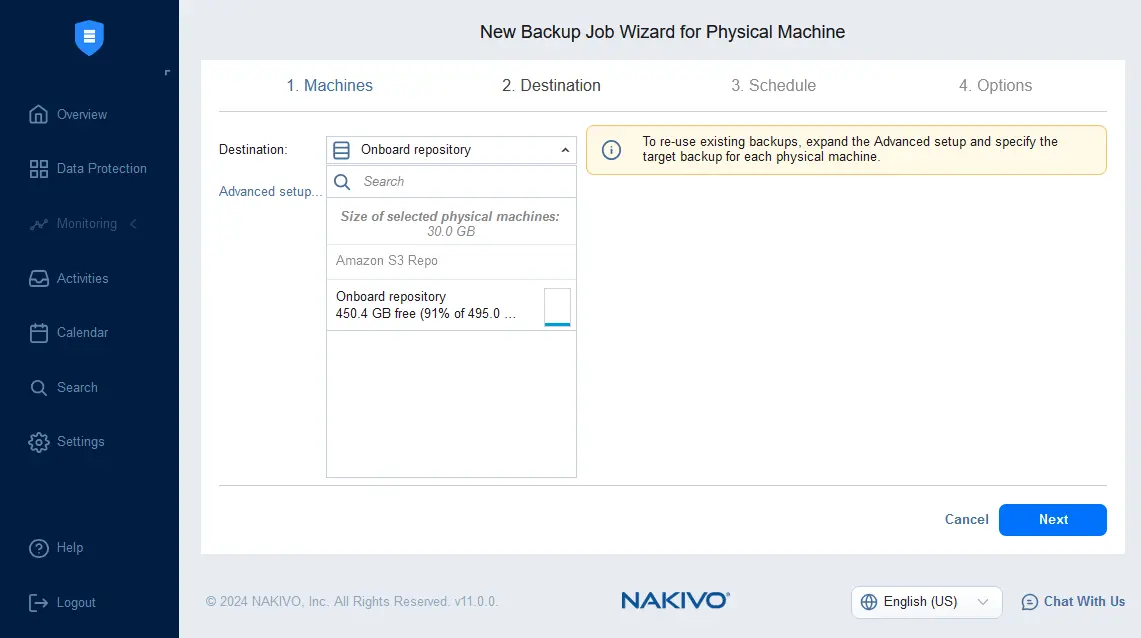
- Select the destination for the physical server backup. We select the Onboard Repository installed with NAKIVO Backup & Replication. You can select any supported backup location after adding the backup repository to the NAKIVO configuration.
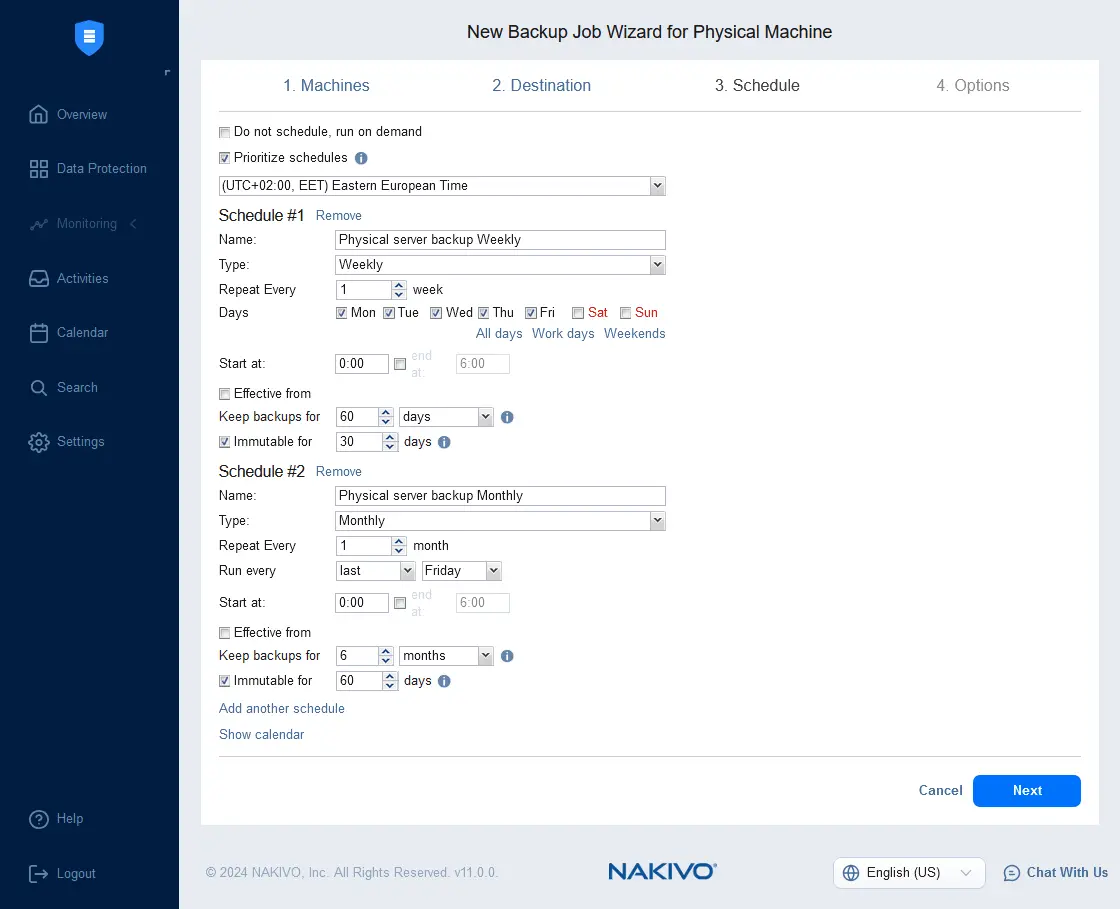
- Configure scheduling and retention settings. You can add multiple schedules and configure a complex retention scheme, including a GFS retention policy. Enable backup immutability to add an additional layer of protection against ransomware if your backup repository supports immutable backups. Backup immutability is supported if a backup repository is attached to a Linux machine with a Linux Transporter installed. Cloud storage, such as Amazon S3, Wasabi and other S3-compatible storage, supports immutability as well.
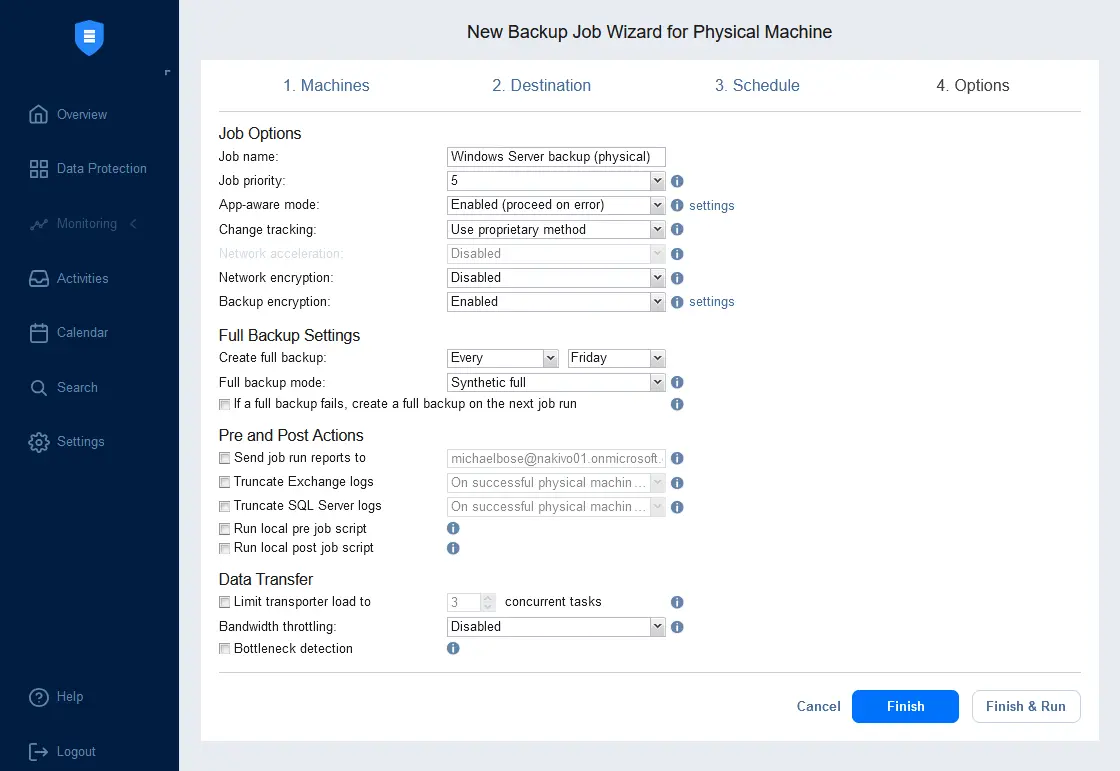
- Configure job options for the physical machine backup. Enter the job name, select the application-aware mode, change tracking, encryption, full backup type and other server backup options. We run incremental with full backups for the selected physical machine. Click Finish & Run to save the settings and run the job.
How to Recover Data from a Full Server Backup
Let’s explain how to recover data from a physical server backup. NAKIVO Backup & Replication supports multiple recovery options, including bare-metal recovery of a full server, full recovery to a virtual machine, file/object recovery for Microsoft Active Directory, Exchange Server and SQL Server and Universal Object Recovery.
Full server recovery
You can recover the entire server on bare metal from a backup. Note that the hardware of the destination server should be identical to the hardware of the original server. Otherwise, you may need to make additional configurations to install drivers.
To perform full recovery of a physical machine to bare metal, you need to create a NAKIVO bootable media, boot from this bootable media on the physical machine you want to recover, open the NAKIVO web interface with bare-metal recovery wizard, connect to the NAKIVO instance and backup repository and perform full recovery. An operating system on a physical machine can be recovered and booted after recovery.
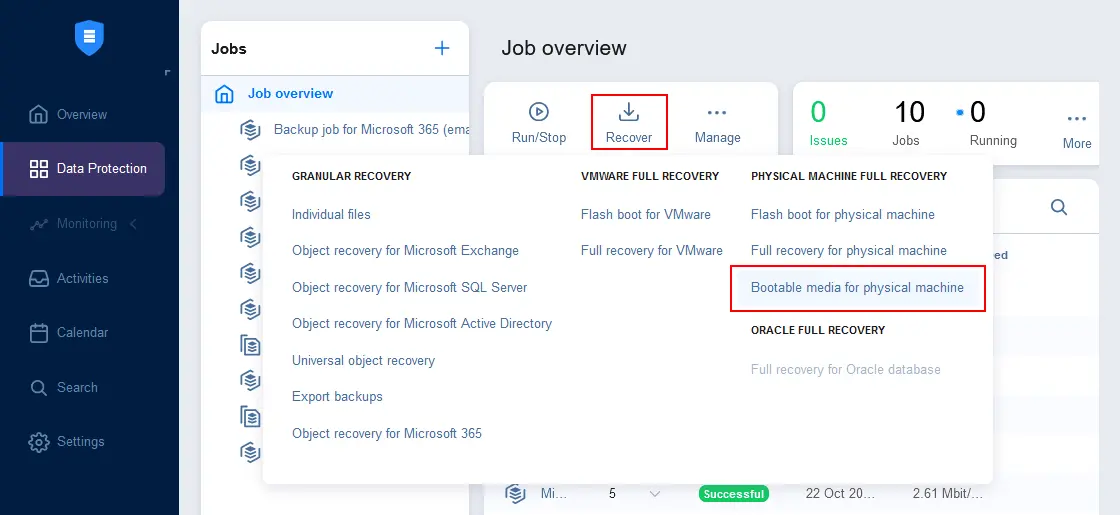
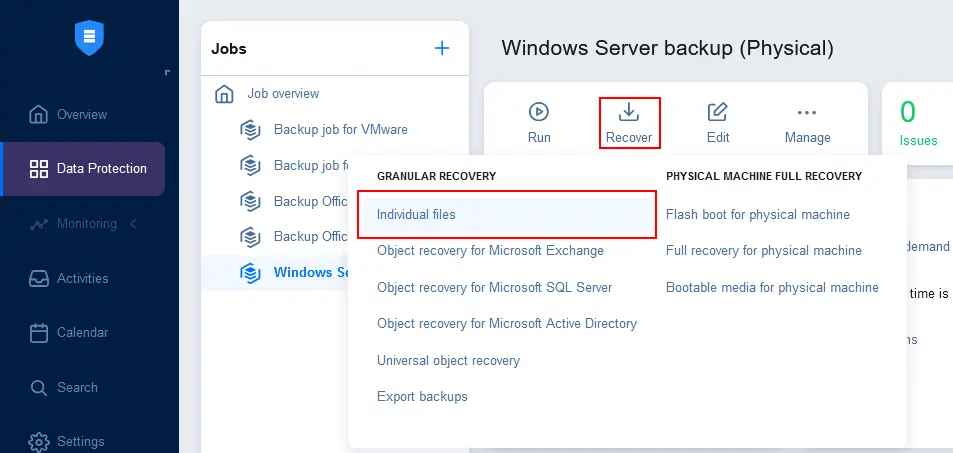
- Go to Data Protection, select your physical server backup job, click recover and hit Bootable media for physical machine.
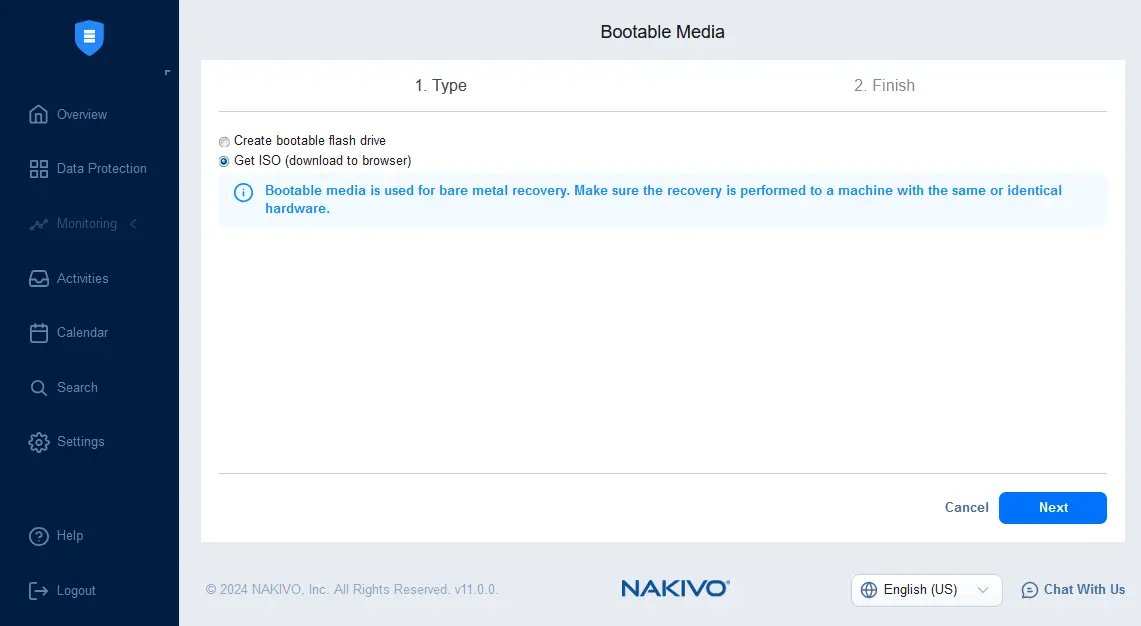
- At the first step of the Bootable Media creation wizard, select the type of bootable media you want to create. There are two options:
- Create bootable flash drive
- Get ISO (download to browser)
In this example, we get a bootable ISO image. You can write this image on a USB flash drive or optical DVD disc and boot from this media on a physical machine.
Click Next to continue.
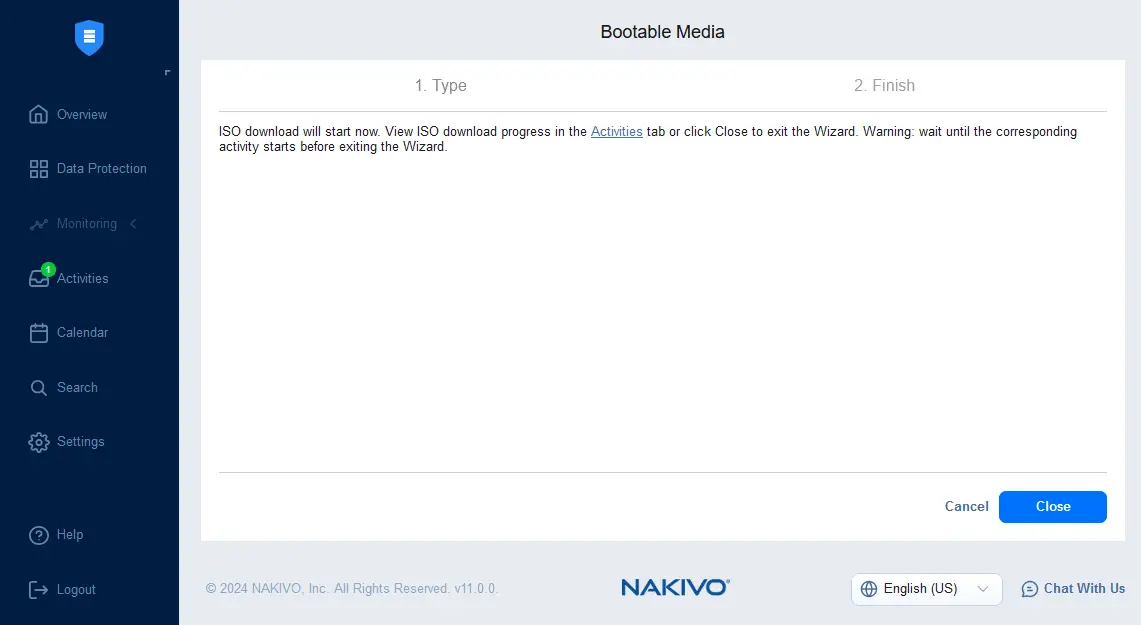
- Wait until the ISO image is prepared, download and save the ISO file in a custom location. Check the job status on the Activities page. When done, click Close.
- Reboot the physical machine to which you want to perform bare-metal recovery from the backup. Select your bootable media as the first boot device in the UEFI/BIOS settings of the physical machine and boot from the NAKIVO bootable media.
- Once the Ubuntu operating system is booted from the NAKIVO bootable media, you should see the NAKIVO Backup & Replication shortcut on the desktop. You may need to wait for a while until the interface with the shortcut is loaded.
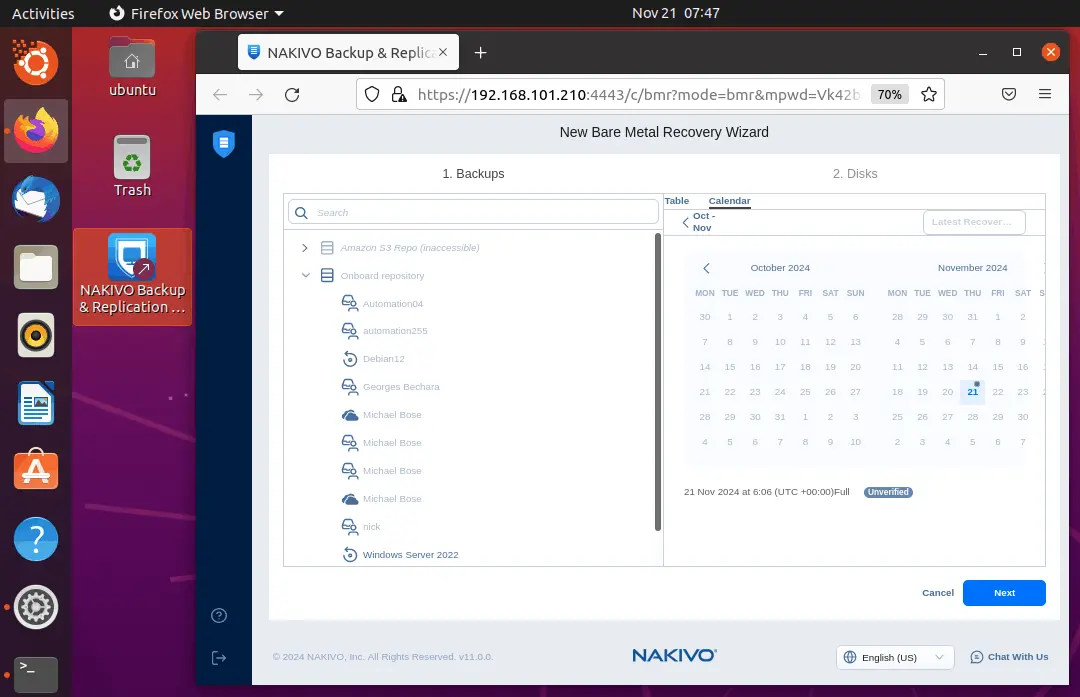
- Click the NAKIVO Backup & Replication shortcut on the desktop. The NAKIVO Backup & Replication login page opens. Enter your credentials to log in. Note that a bare metal recovery wizard opens automatically after the login and you are connected to the NAKIVO Backup & Replication Director where you created a physical server backup and the bootable ISO image.
Note: You may need to edit your IP address and port in the address bar of the web browser if they are different from the IP address and port used to access your NAKIVO Backup & Replication instance. By default, the IP address and port used on the NAKIVO instance when you generate the bootable ISO image are saved to the bare-metal recovery appliance image.
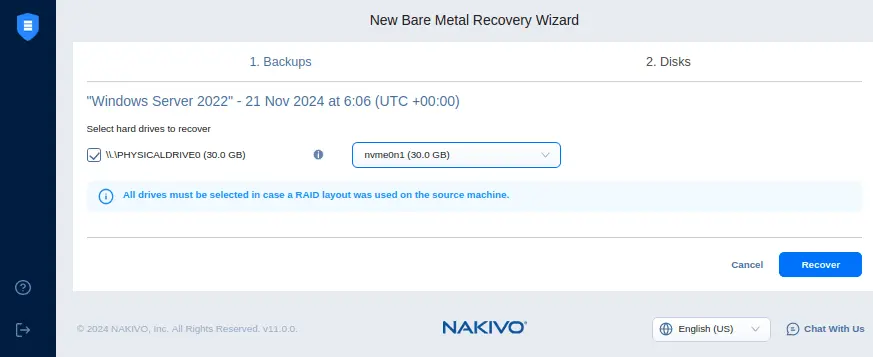
- Select the disks to recover from the backup and the physical disk where to recover data. Select all drives if the RAID layout is used on the source machine.
Click Recover to run full bare-metal recovery from a physical server backup.
You can also watch this video for bare metal recovery steps in NAKIVO Backup & Replication:
How to recover specific files
With NAKIVO Backup & Replication, you can perform granular recovery and restore individual files and objects, such as objects from Microsoft Exchange Server, Microsoft SQL Server and Active Directory. You can also recover individual files from physical machine backups, including servers and workstations running Windows and Linux. Universal Object Recovery allows you to recover any files (objects) used by any application.
Let’s explain how to recover individual files from a full server backup.
- Go to Data Protection, select the physical server backup job, click Recover and hit Individual files.
- Select the physical machine backup and select a recovery point. You can use the table or calendar view for recovery points. We select the latest recovery point and go to the next step.
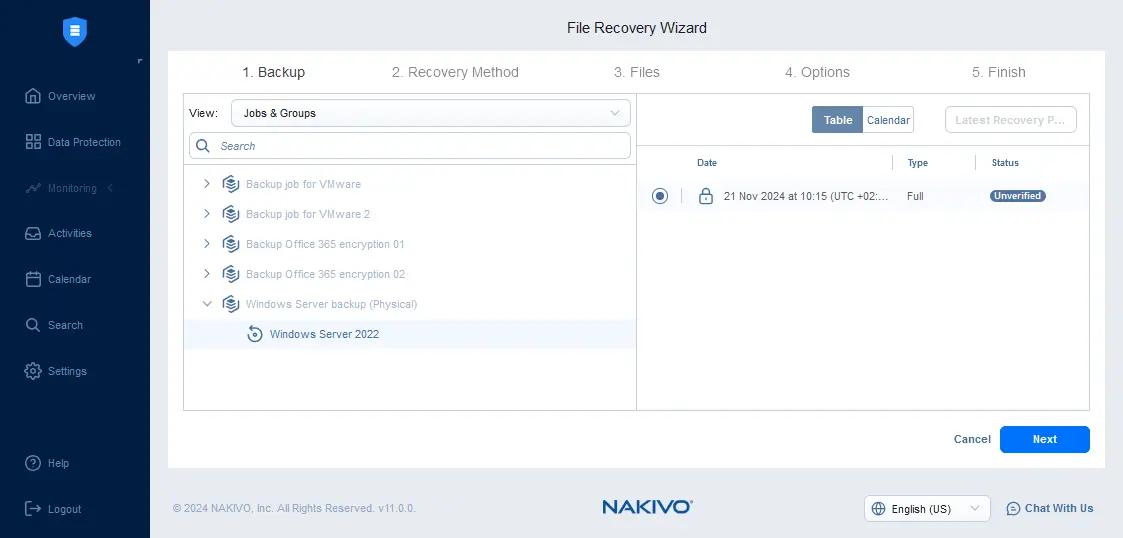
- Select a recovery method. There are three methods for file recovery:
- Download to browser or send via email
- Recover to the following server
- Recover to file share
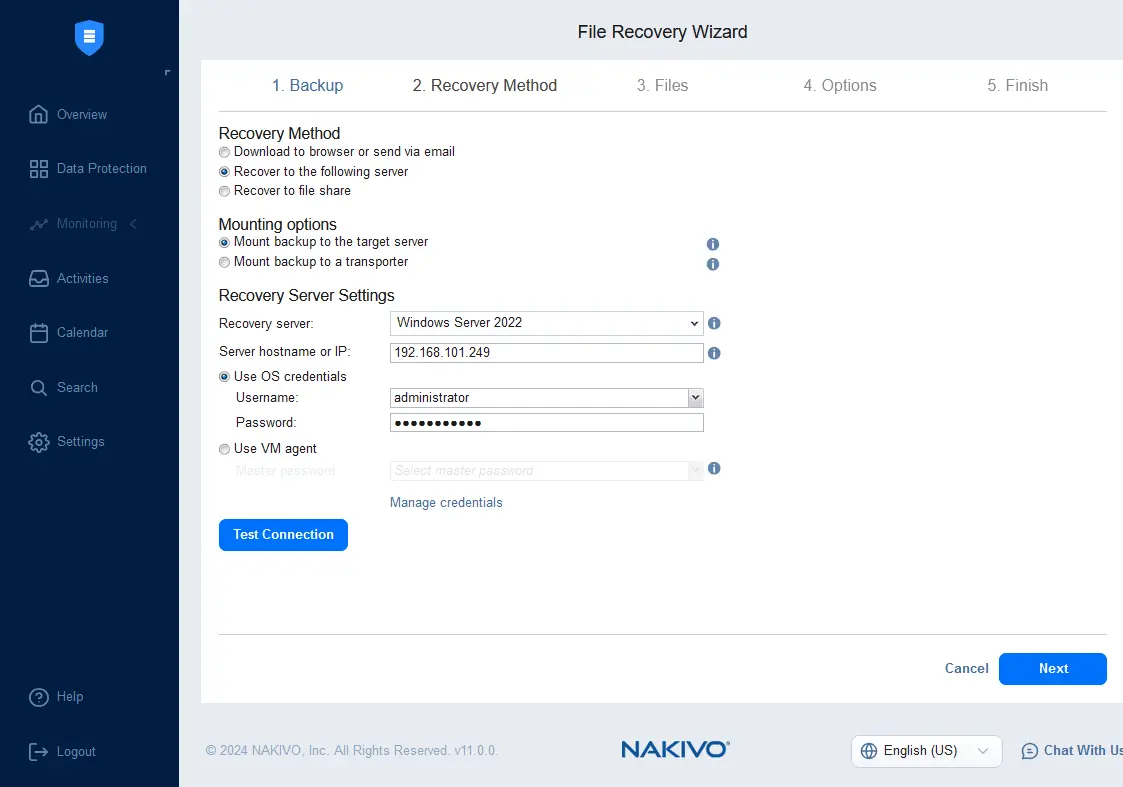
Let’s select the second option and recover the needed files to the specified server. You can select the source machine or another machine to recover files.
Select mounting options:
- Mount backup to the target server
- Mount backup to a transporter
Since we selected file recovery to the following server, we must select the server from the machines available in the NAKIVO inventory. Enter the IP address of this machine and enter the credentials with enough permissions to write the recovered files.
Click Test Connection to check whether the entered parameters are correct. If the test is successful, hit Next.
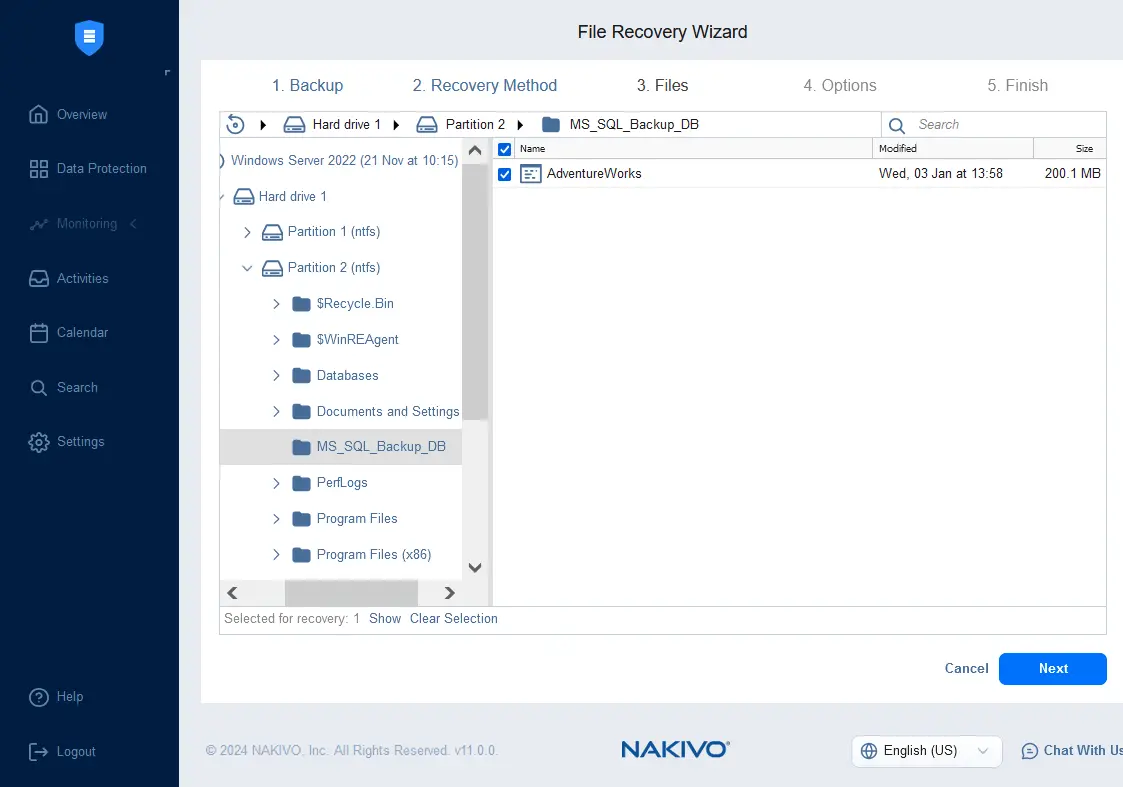
- Wait until the file tree is loaded and select the files to recover.
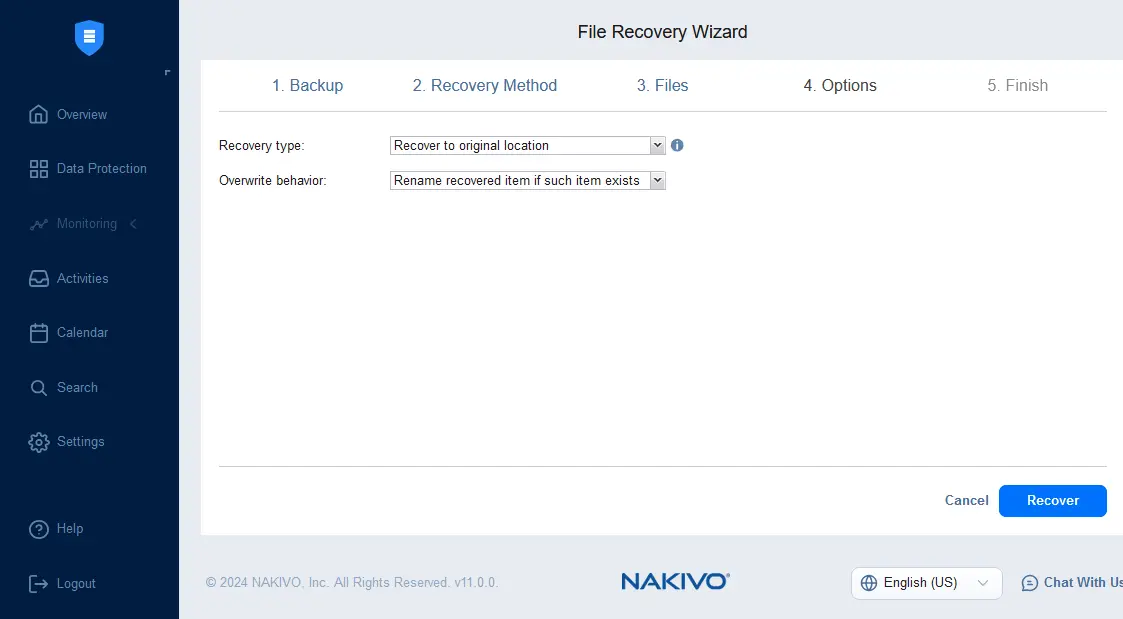
- Select the file recovery options, such as recovery type and overwrite behavior.
- Recovery type:
- Recover to original location
- Recover to custom location
- Overwrite behavior:
- Rename recovered item if such item exists
- Skip recovered item if such item exists
- Overwrite the original item if such item exists
We recover the selected file to the original location by selecting to rename the recovered item if such item exists.
Click Recover to start the file recovery process.
- Recovery type:
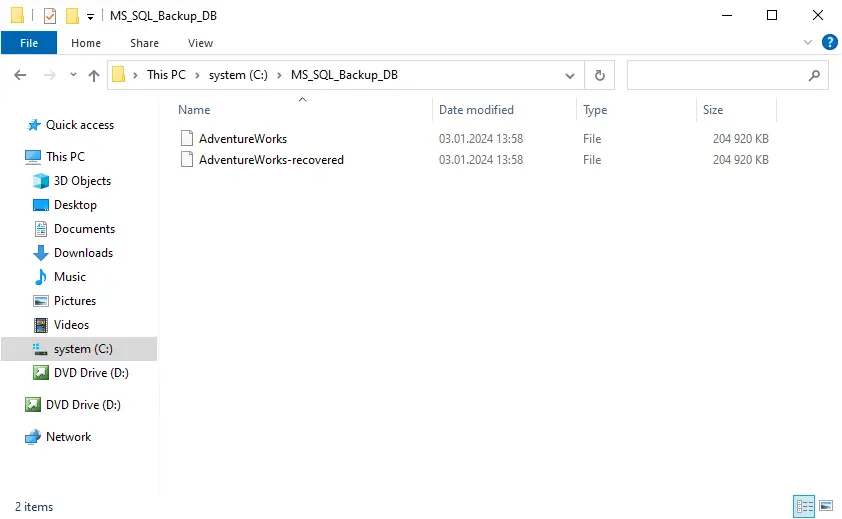
- Once the file recovery process has finished, we can check whether the selected file was recovered. As we can see in the screenshot below, the file is recovered successfully. As the name of the recovered file matches the original file name, the recovered file is renamed according to the selected options.
Physical to virtual recovery
You can perform recovery of a physical machine to a virtual machine using a backup in NAKIVO Backup & Replication, including the instant recovery to a VM (Flash VM Boot). This option provides more flexibility and allows you to recover the entire machine (including an operating system, installed applications and files) as quickly as possible. You may need this option in situations such as hardware failure of a server when there are no free physical machines to perform full bare-metal recovery. Let’s explain how to recover the full machine from a physical machine backup to a virtual machine.
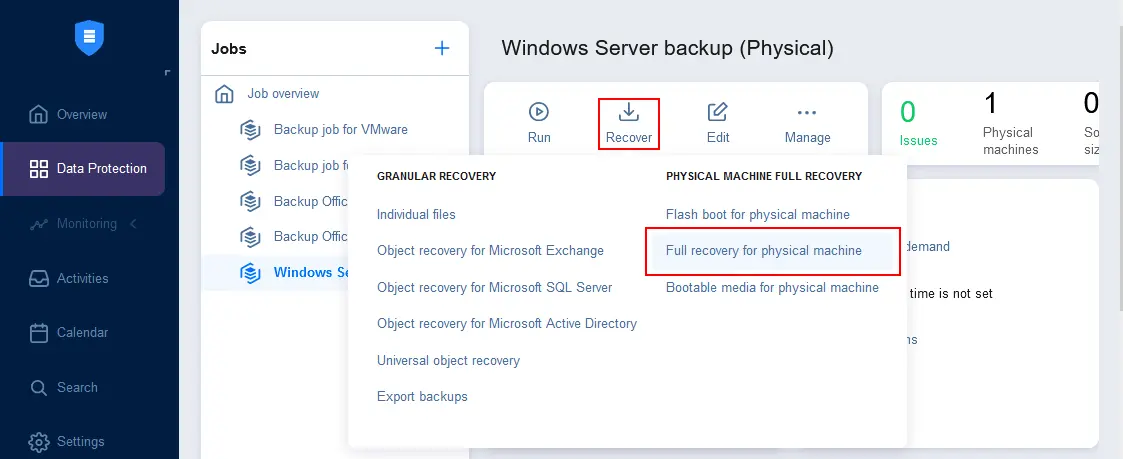
- Go to Data Protection, optionally select a physical server backup job, click Recover and hit Full recovery for physical machine.
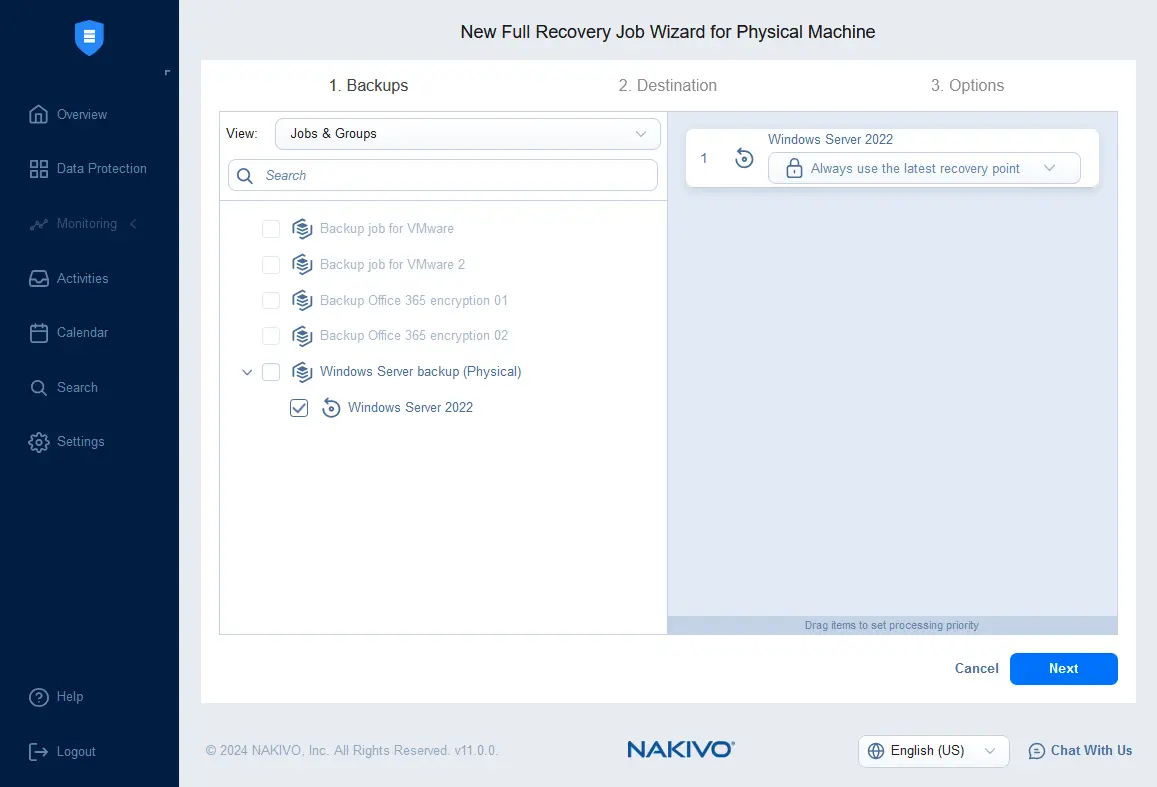
- Ensure that the needed physical server backup job is selected and select a recovery point.
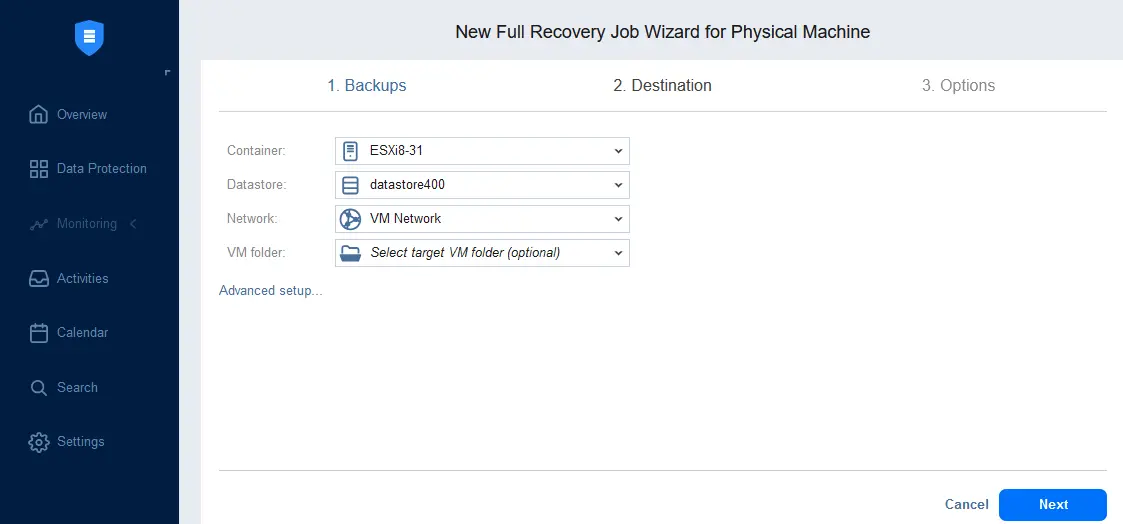
- Select the destination for the recovered machine. Select the virtualization host or cluster, datastore and VM network. In this example, we select an ESXi host. Ensure that the datastore has enough free space to perform recovery.
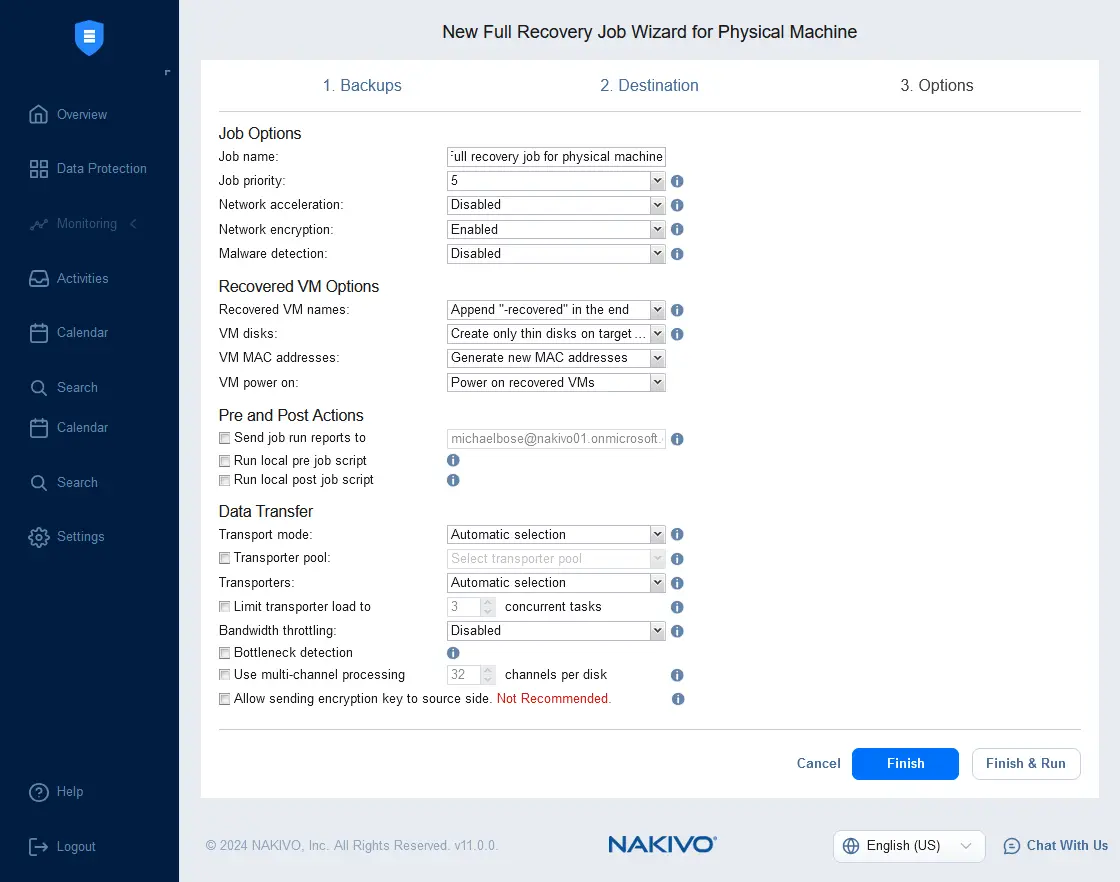
- Select recovery options. Enter the job name, specify encryption options and enable malware detection with a supported antivirus if needed. You can edit other options or use the default values. Click Finish & Run to save settings and run the full recovery job.
Conclusion
Backing up physical servers is an essential part of the server backup strategy that should be implemented in each organization. Choose a backup solution that supports image-based backup of the entire server without interrupting normal operations and providing consistent backup data. NAKIVO Backup & Replication supports physical machine backup for servers and workstations. Protect your infrastructure with the NAKIVO solution by backing up physical machines, virtual machines, Microsoft 365, file shares and other items.