How to Add a Virtual Floppy Drive to Virtual Machines in VMware vSphere
While physical floppy drives have been obsolete for almost two decades, virtual floppy drives are very much alive and have proved to be a useful asset in virtual environments.
This blog post provides a brief overview of virtual floppy drives and explains how to create virtual floppy disk drives for virtual machines in vSphere.

What is a Virtual Floppy Drive?
A virtual floppy drive is a software component that emulates the functionality of a physical floppy drive. In most cases, the host operating system treats the virtual floppy drive as if it were a physical floppy drive. Just like its physical counterpart, a virtual floppy drive is mounted on the drive assigned the letter A:. But instead of reading data from physical diskettes, a virtual floppy drive in VMware only reads .flp floppy images that are stored on a hard drive.
Aside from being a reliable alternative to old hardware, a virtual floppy drive in a VMware virtual machine can help you execute tasks that may not be performed without the use of a floppy disk such as running proprietary legacy software and configuring floppy-based routers and firewalls.
Adding a Virtual Floppy Drive in vSphere
There is more than one method for adding a virtual floppy drive to VMware VMs. In fact, you can add a virtual floppy drive to your virtual machine(s) by using one of four methods:
- vSphere Client for Windows (vSphere up to version 6.0)
- vSphere Web Client (vSphere up to version 6.7)
- VMware Workstation Pro (up to version 15.0)
- VMware ESXi Host Client (vSphere up to version 7.0)
Adding a Virtual Floppy Drive to a virtual machine in vSphere Client for Windows
To create a virtual floppy drive for your VM in vSphere Client for Windows, verify that you have the Add or remove device privilege on the VM then follow the instructions below:
- On the
Homescreen, underInventory, clickHosts and Clusters.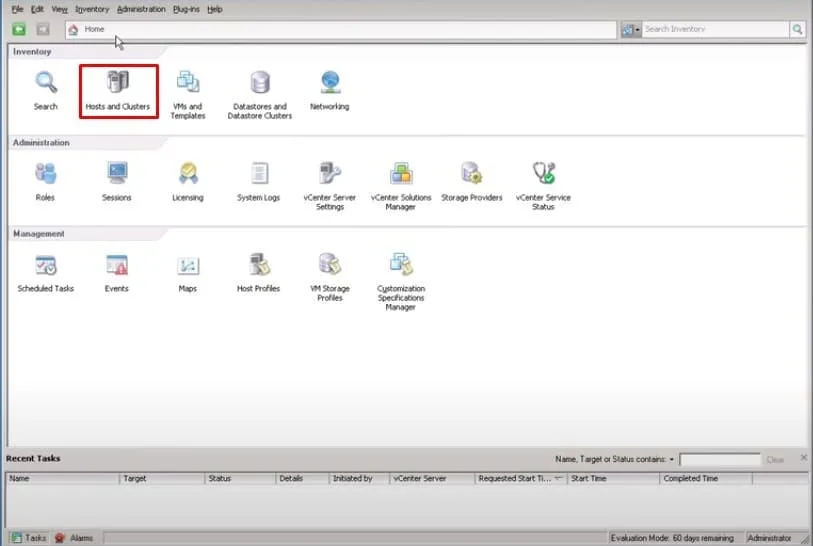
- In the left side bar, choose the VM to which you will add the virtual floppy drive and click on its display name.
- In the panel that opens, under
Basic Tasks, clickEdit virtual machine settings.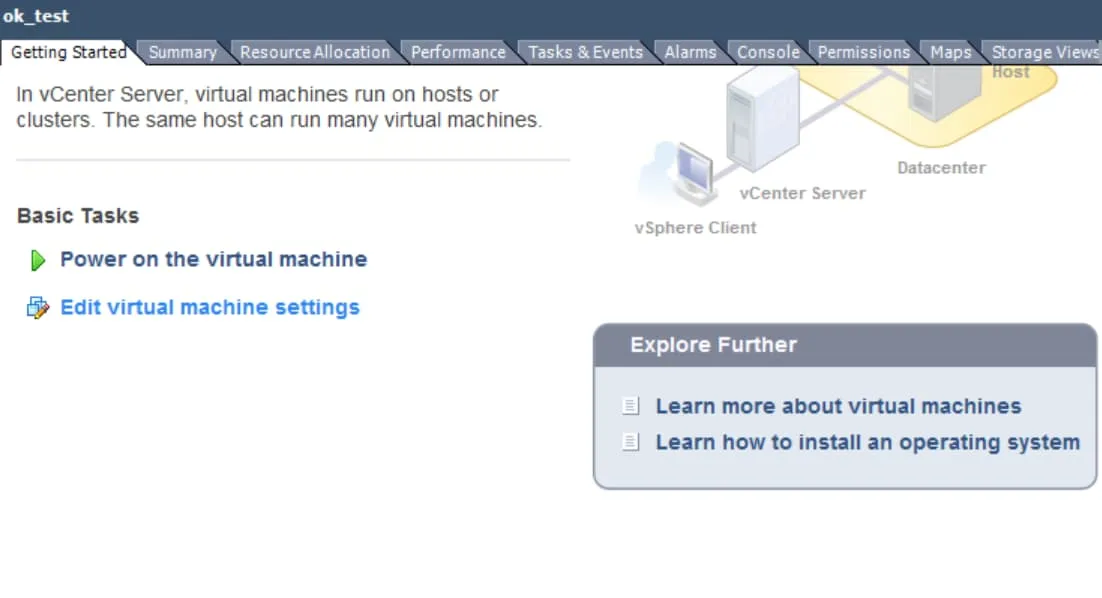
- In the
Virtual Machine Propertieswindow, stay on theHardwaretab, and under Hardware, selectFloppy drive 1, then clickOKat the bottom of the page.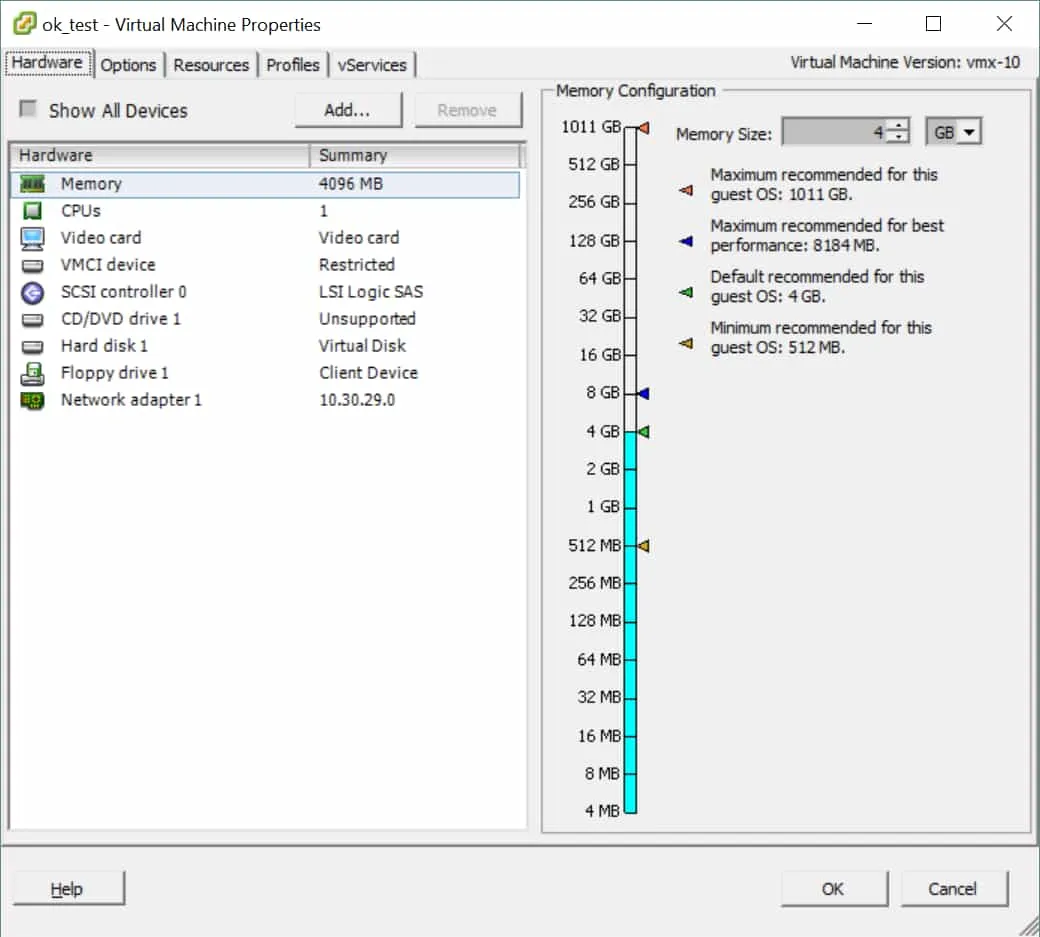
- In the
Add Hardwarewizard, underChoose the type of device to add, selectFloppy Driveand then clickNext.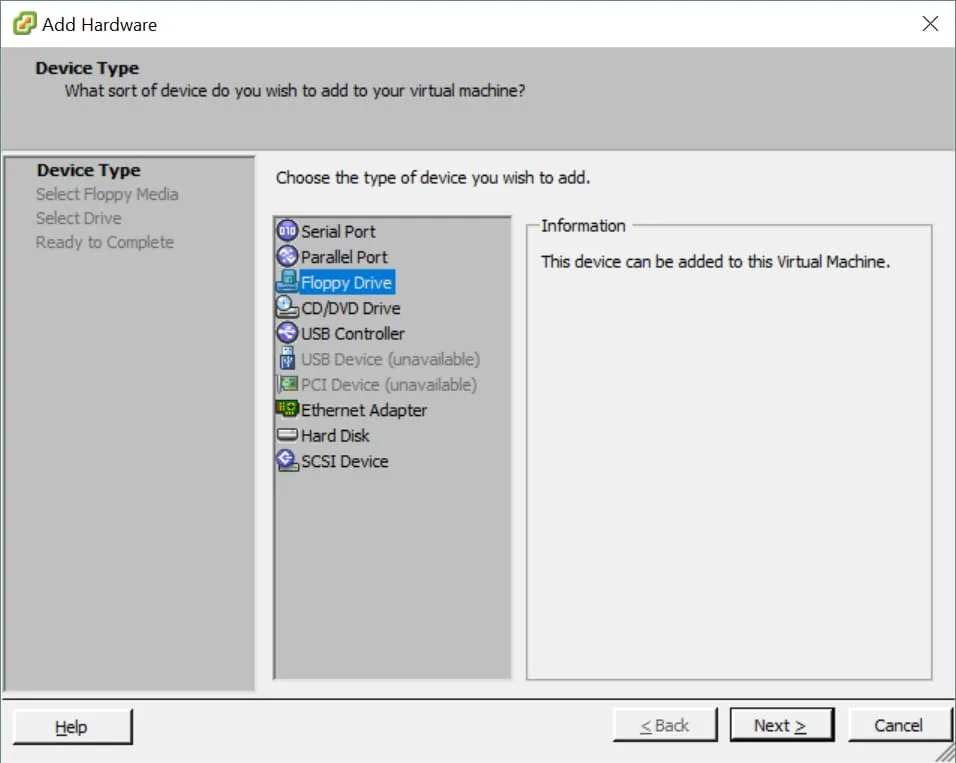
- In the next section titled
Floppy Media Type, selectUse a floppy image, then clickNext.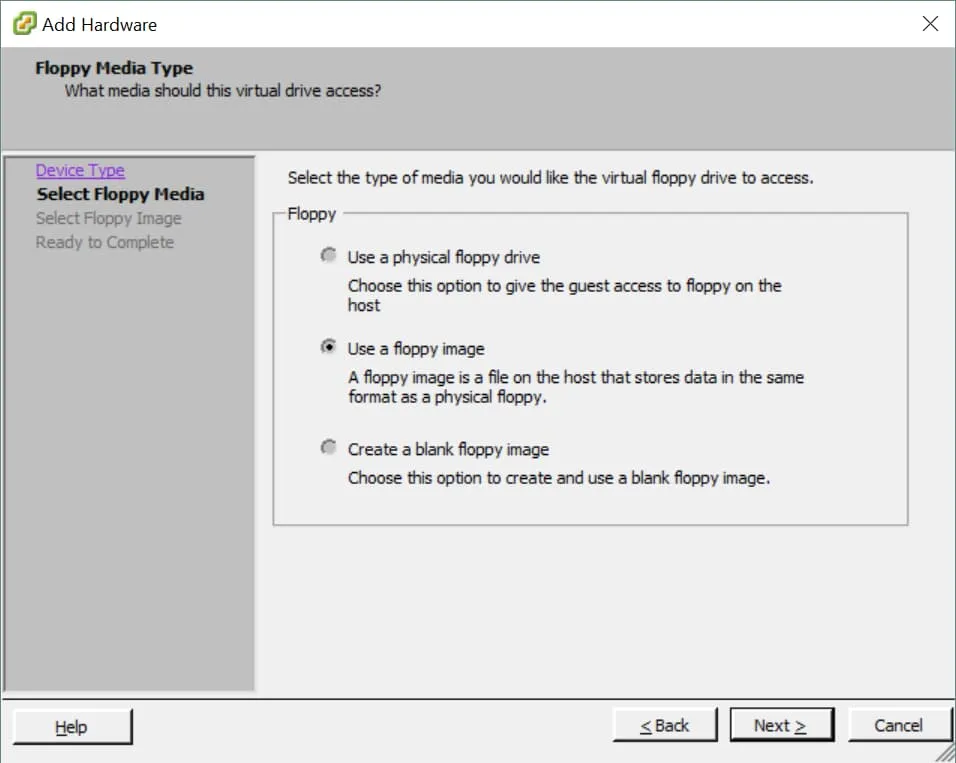
- You are now asked to select the virtual floppy disk image to mount. In the
Floppy Imagesection, clickBrowse.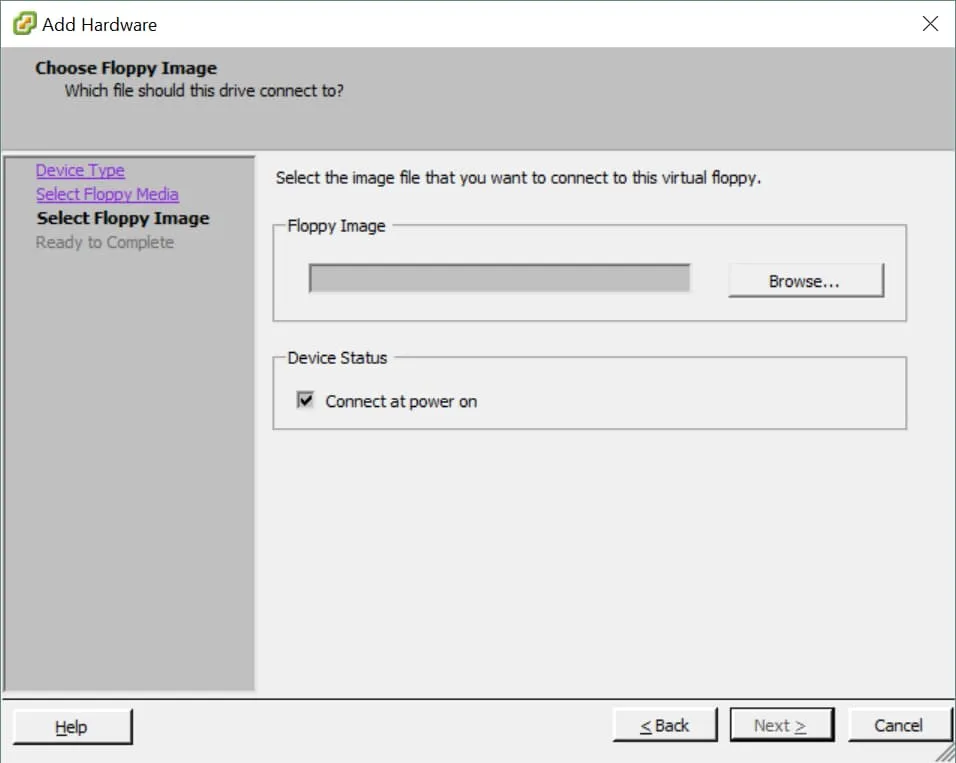
- Browse to the destination folder where the .flp virtual floppy disk file is stored. Select the .flp file and click
Open.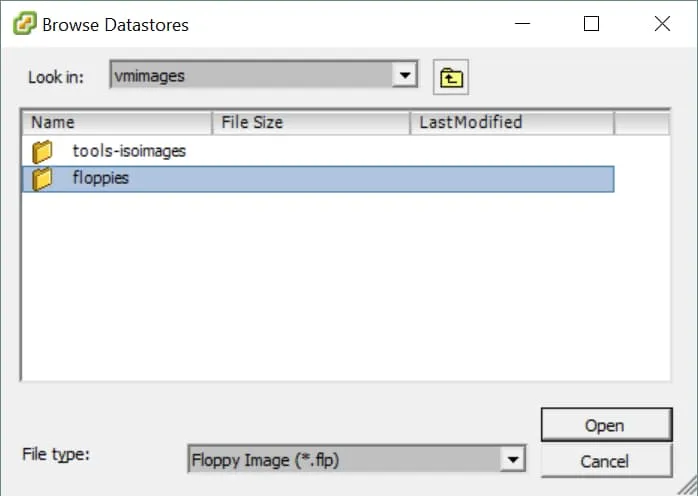
- Under
Device Status, checkConnect at power onto have the floppy drive connected to the virtual machine on startup, and clickNext.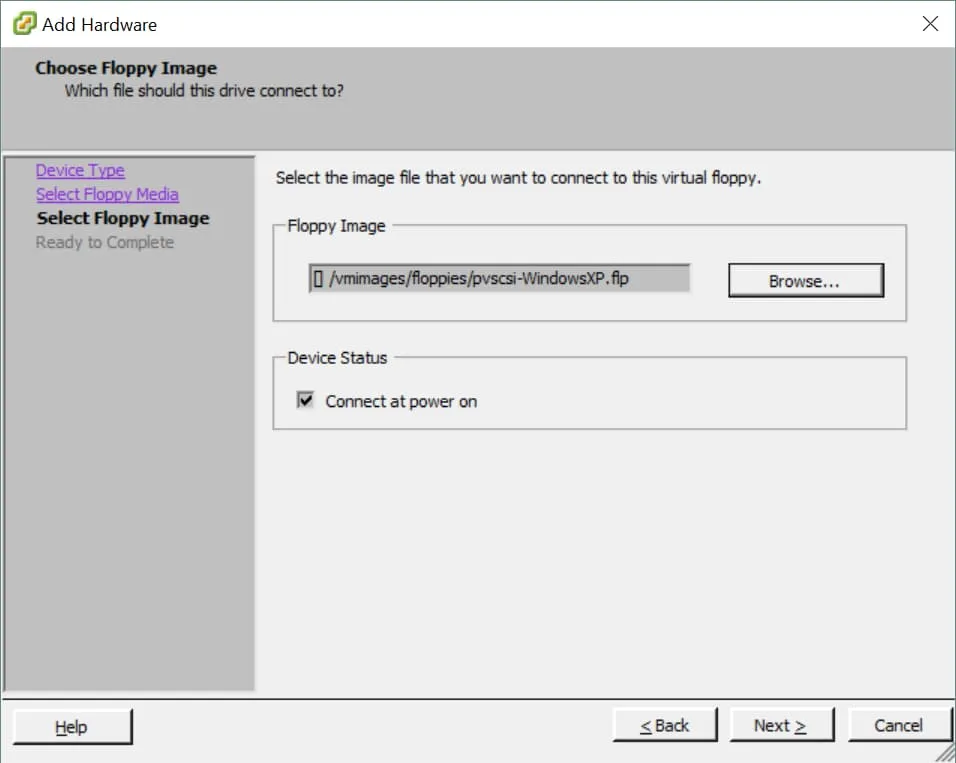
- On the
Ready to Completepage, clickFinish.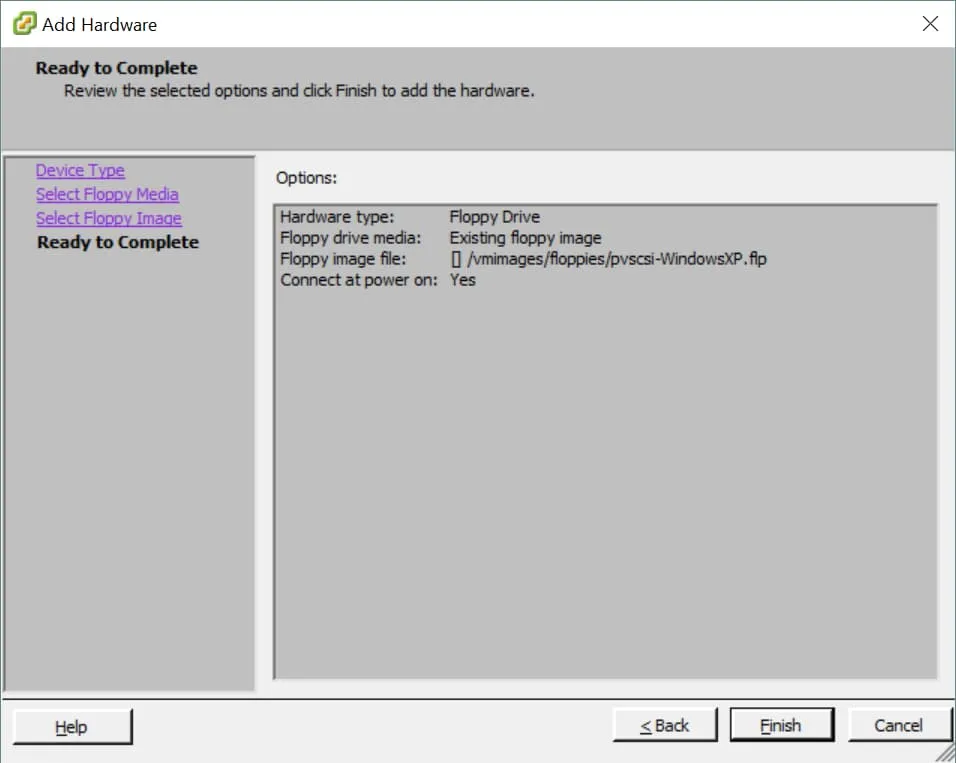
Adding a Virtual Floppy Drive to VMs in vSphere Web Client
To create a virtual floppy drive for a VM in vSphere Web Client, verify that you have the Add or remove device privilege on the VM and then follow the instructions below:
- Log in to
vSphere Web Client, and in the left panel underHome, clickGlobal Inventory List. - In the left panel, click
Virtual Machines. In theVirtual Machineswindow on the right, look for the VM to add a virtual floppy drive. Then right-click on its display name and clickEdit Settings.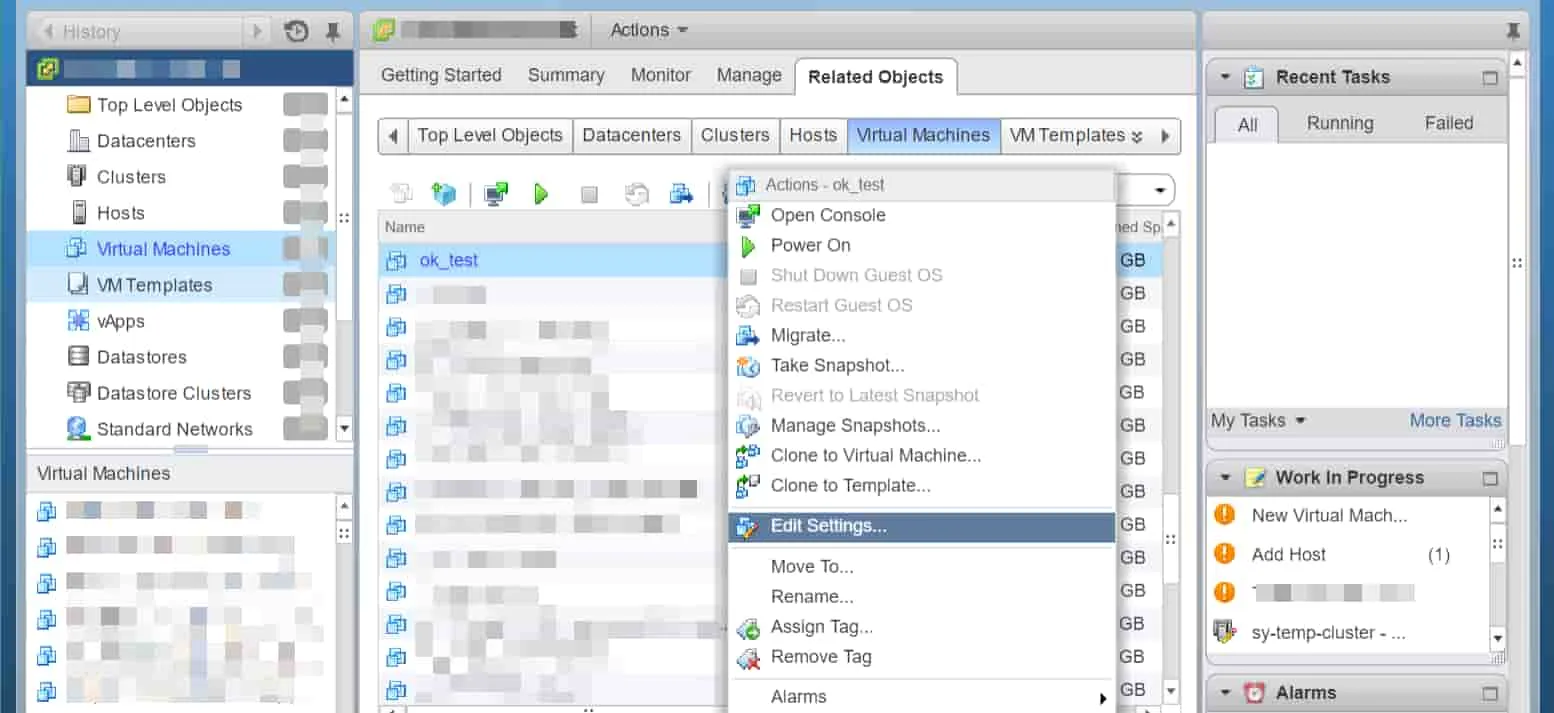
- In the window that opens, on the
Virtual Hardwaretab, selectFloppy Drivefrom theNew devicedrop-down menu and clickAdd.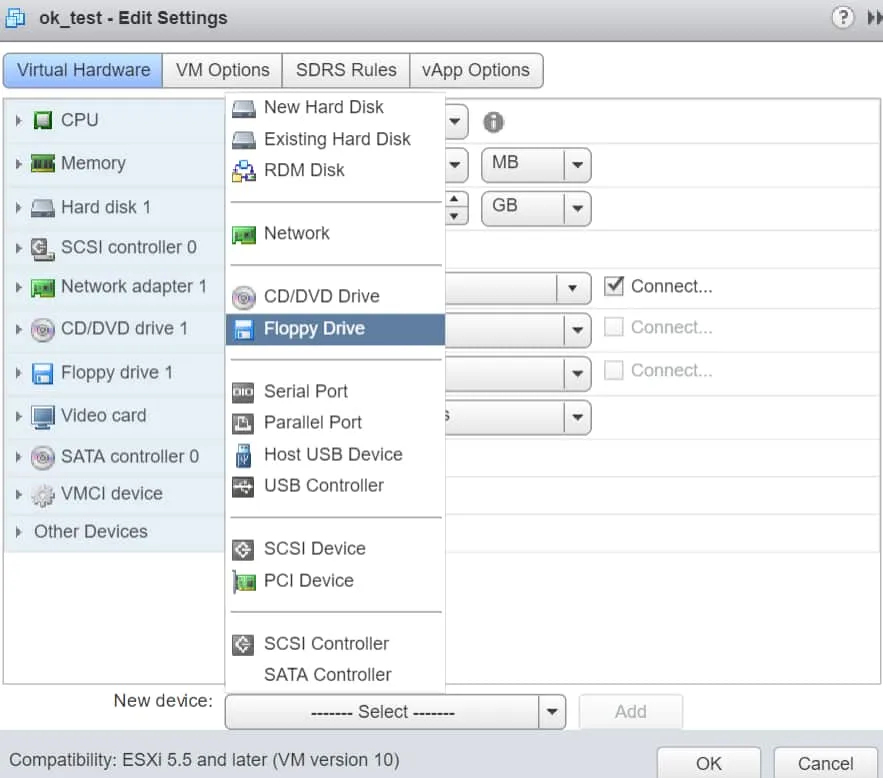
- A new item titled
New Floppy driveis now created in the hardware list. ExpandClient Deviceand chooseUse existing floppy drive.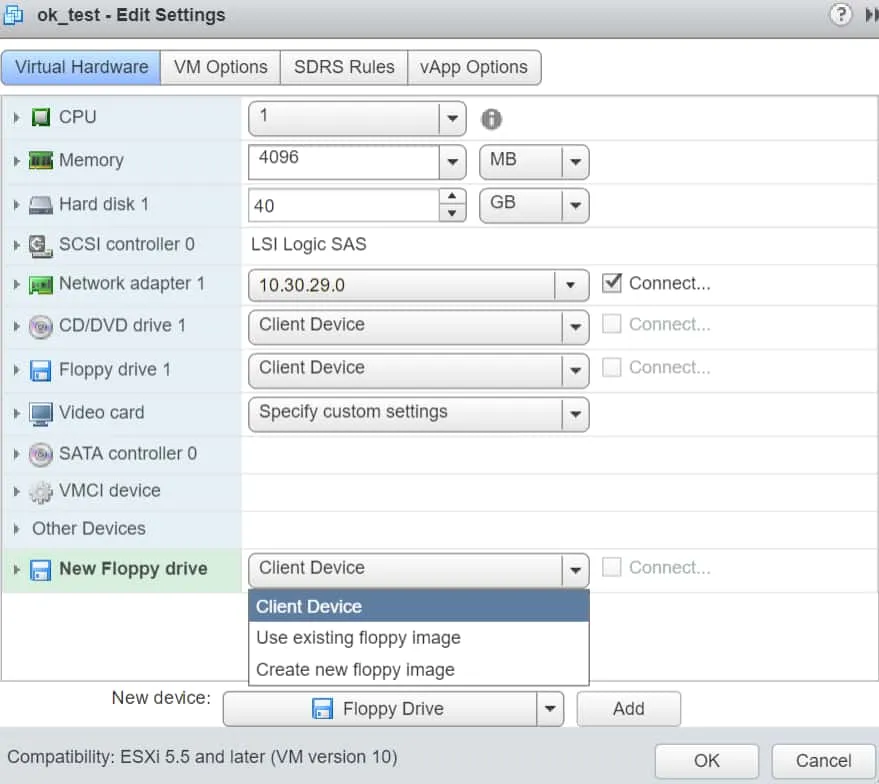
- Browse to the destination folder where the .flp virtual floppy disk file is stored. Select the .flp file and click
OK.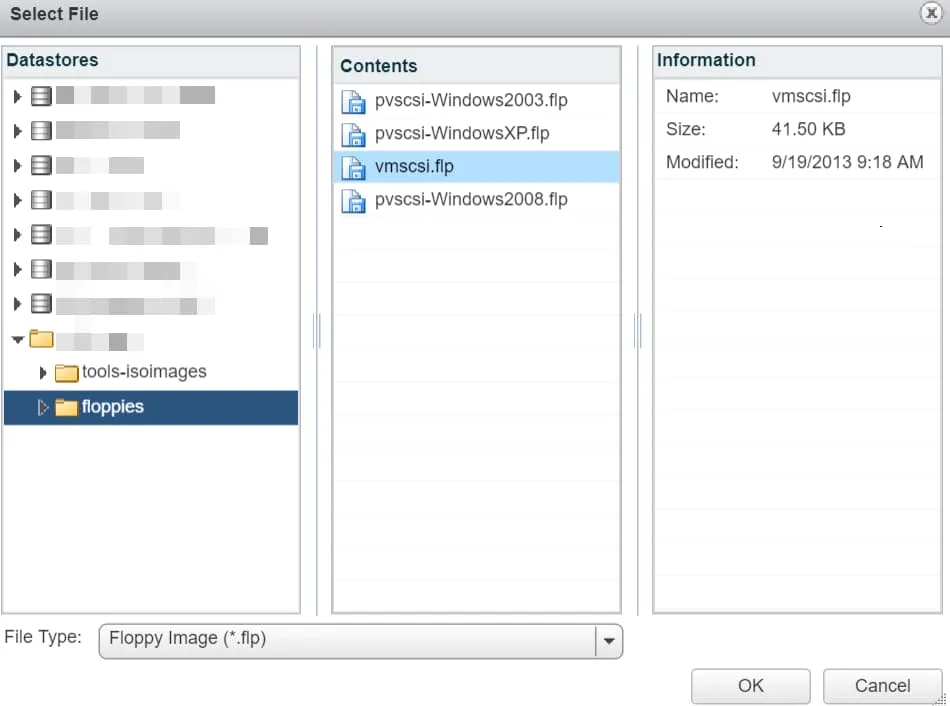
- To connect the virtual floppy drive when the VM powers on, select the
Connect At PowerOncheckbox and clickOK.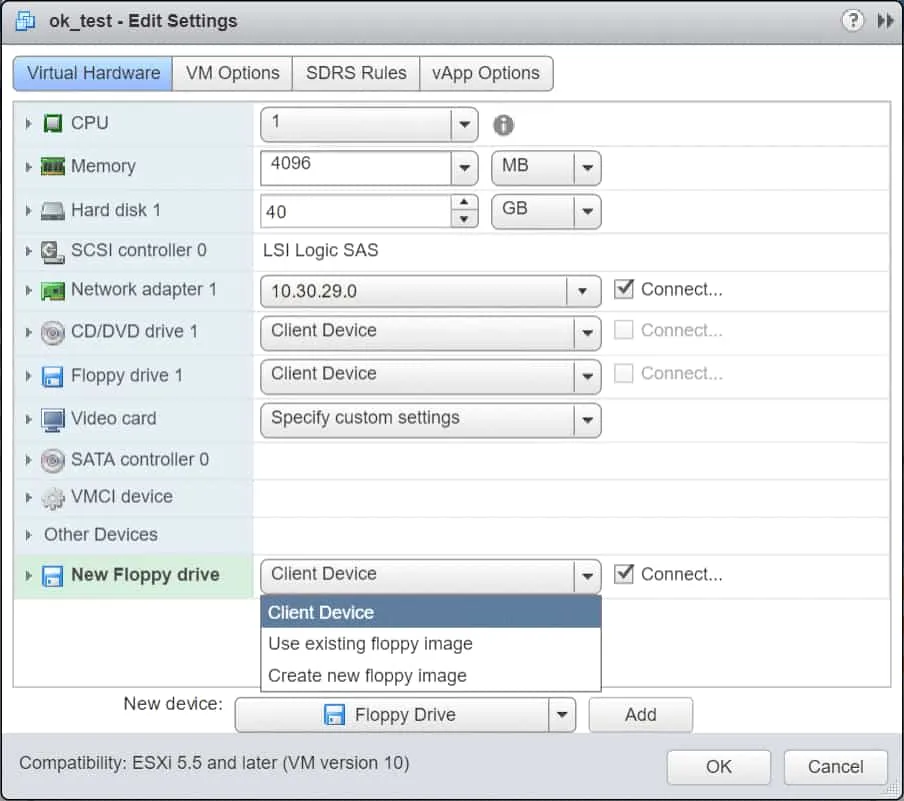
Adding a Virtual Floppy Drive to VMs in VMware Workstation
To create a virtual floppy drive for a VM in VMware Workstation, follow the instructions below:
- In the left panel, under
Library, click on the VM you wish to add a virtual floppy drive to. - On the right side of Workstation, under your VM’s display name, click
Edit virtual machine settings.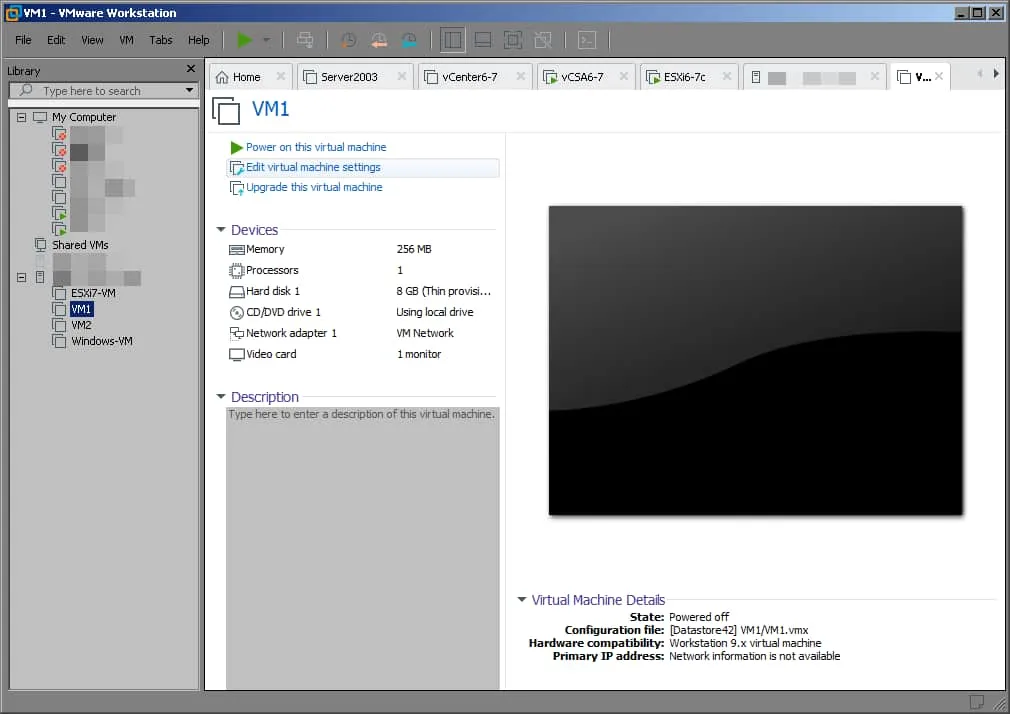
- In the
Virtual Machine Settingswindow, at the bottom of the Hardware tab, clickAdd.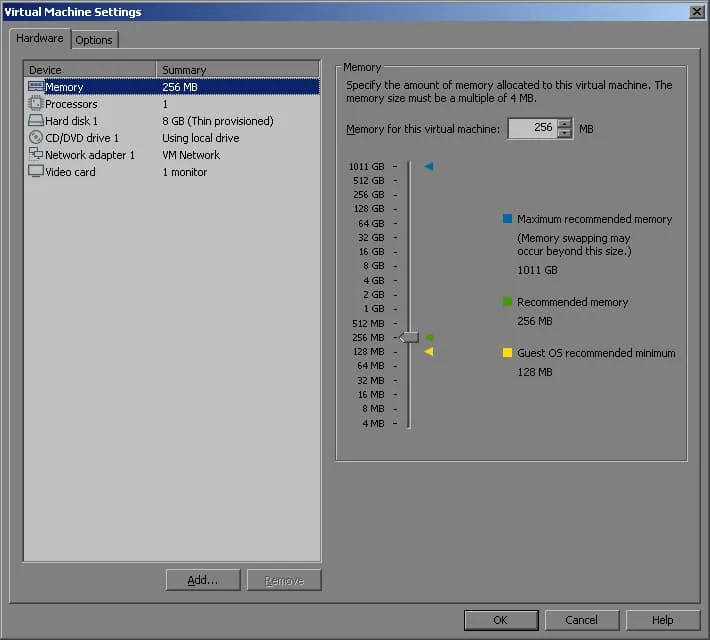
- In the
Add Hardware Wizardwindow, underHardware types, selectFloppy Driveand clickFinishat the bottom.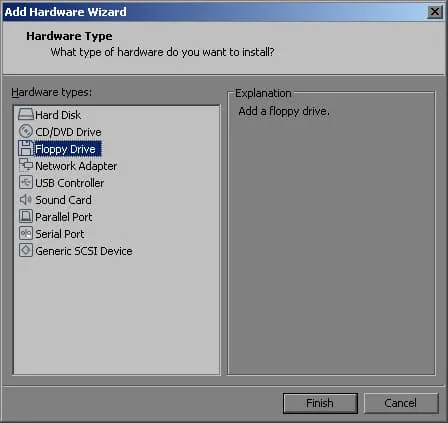
- Back in the
Hardwaretab, underConnection, expandLocationand selectRemote Server.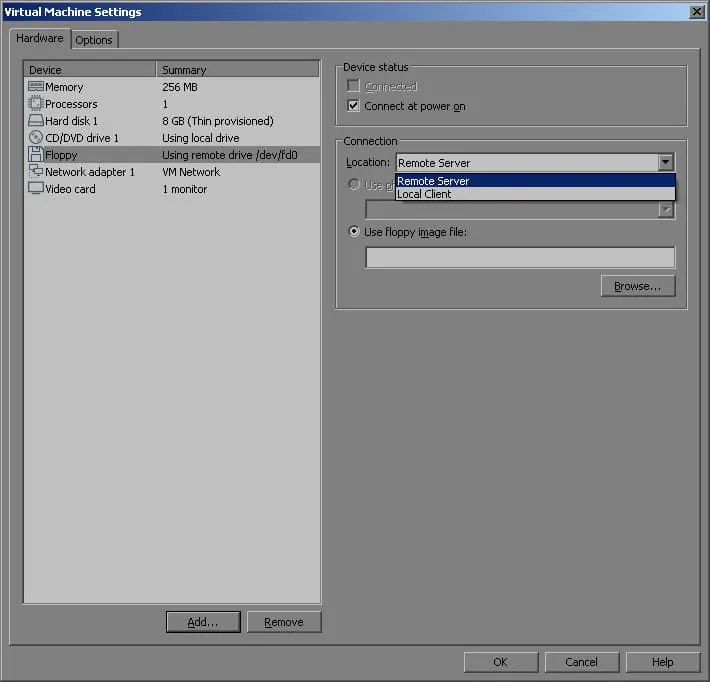
- Under Use
Floppy image file, clickBrowse. Select a .flp image and clickOpen.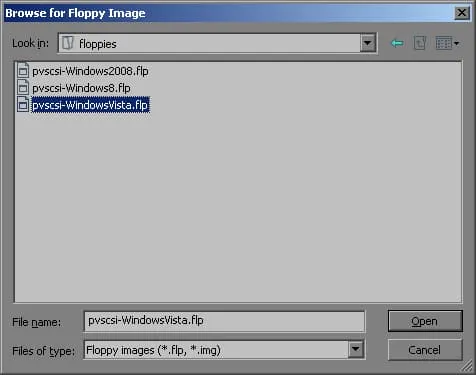
- Back in the
Virtual Machine Settings, verify that you have selected the right .flp virtual floppy disk file and then clickOK.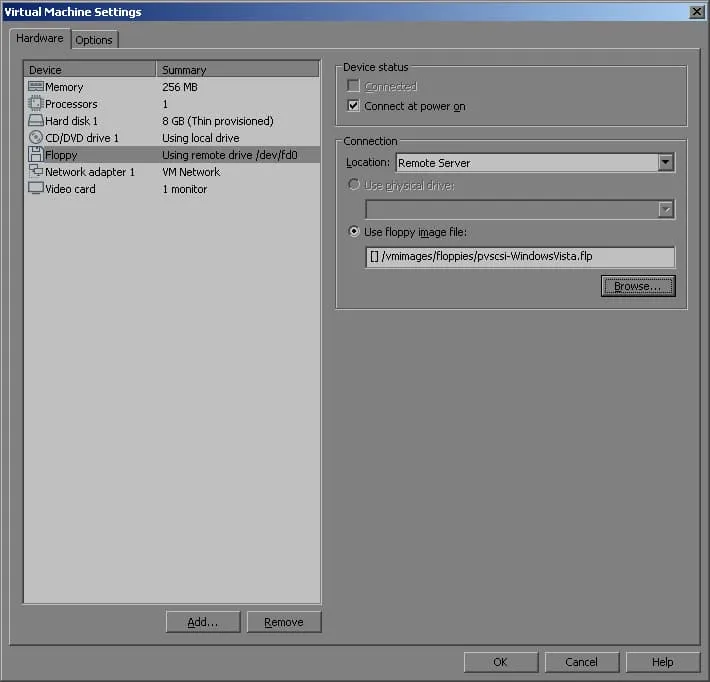
Adding a Virtual Floppy Drive to VMs in VMware ESXi Host Client
To create a virtual floppy drive for a VM in VMware ESXi Host Client, power off the VM and then follow the instructions below:
- Under
Navigatorin the left side panel, clickVirtual Machines.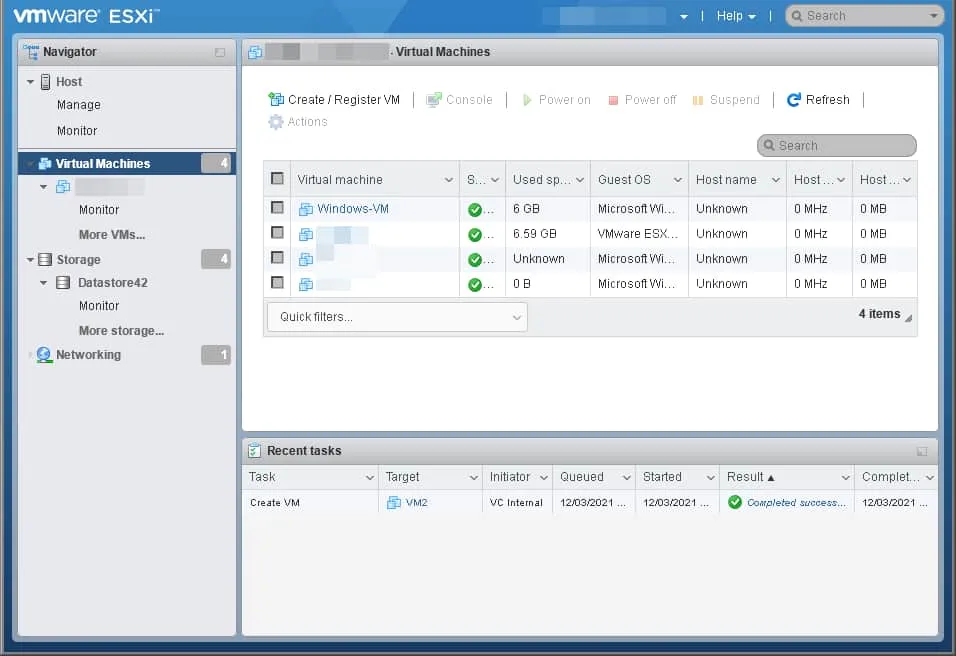
- Moving to the center-right side of the Host Client, look for the VM to add the virtual floppy drive to. Right-click on the display name of your VM and click
Edit Settings.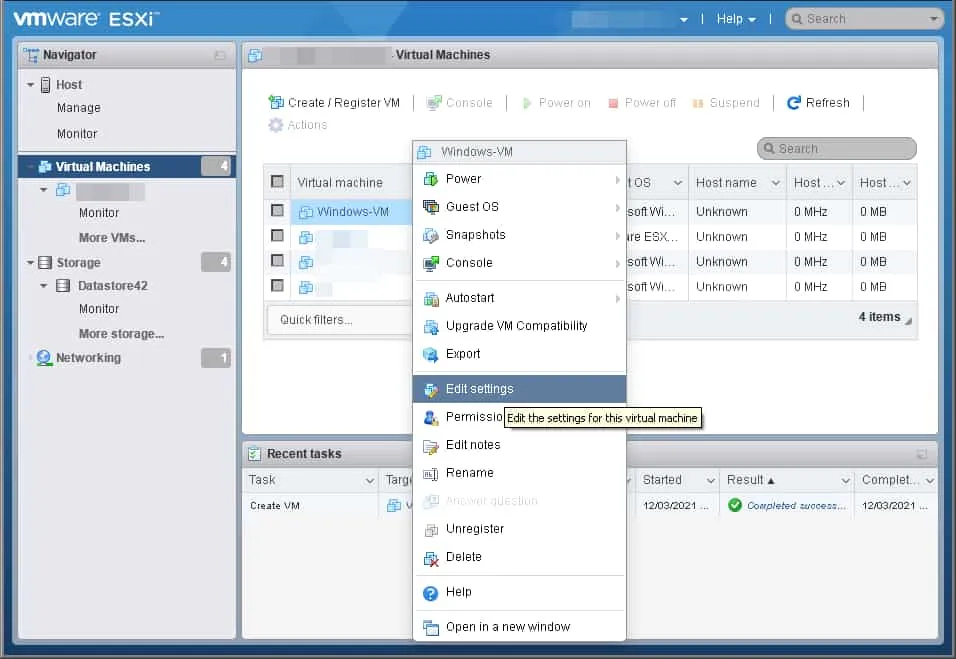
- In the
Virtual Hardwaretab, clickAdd other deviceand then clickFloppy drive.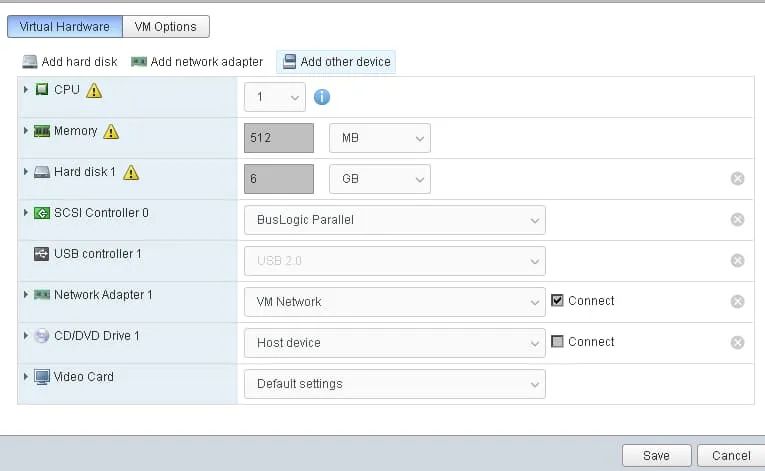
- In the
Datastore browserwindow, browse to the destination folder where the .flp virtual floppy disk file is stored, select the .flp image to mount and then clickSelect.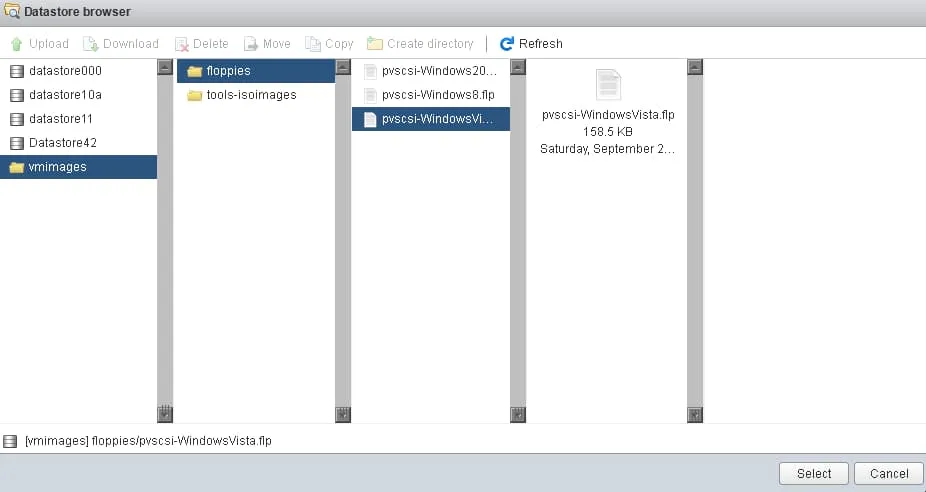
- To immediately connect your newly created virtual floppy drive when the VM powers on, select the
Connect at power oncheckbox and clickSave.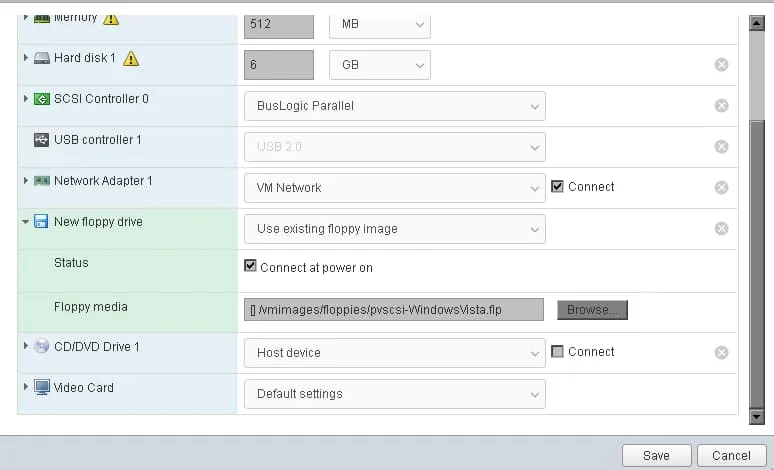
Wrapping up
We just covered four different methods for adding a virtual floppy drive to a VMware VM. Use your vSphere interface of choice and follow the corresponding guide to get your virtual floppy drive up and running in a few minutes.
While virtual floppy drives and disks are still used in virtual machines due to their high reliability in terms of managing data, among other features, the risk of data loss still exists. A comprehensive backup solution like NAKIVO Backup & Replication provides efficient backups and ensures that your VMware virtual machines, applications and data are recoverable within minutes.