What’s New in v11 Beta

Agentless Backup for Proxmox VE
Seamless, fast, robust backup
Create agentless, app-aware backups for Proxmox VMs without the need to install guest OS agents. Run fast incremental backups with native change tracking to capture only changed data blocks. Send backups to local storage, public clouds, S3-compatible storage, deduplication appliances, or tape for full 3-2-1 backup rule implementation. Enable backup encryption and immutability for robust ransomware protection and perform full and instant granular VM recoveries with near-zero downtime.

Backup to Cloud for Microsoft 365
Hybrid, immutable backup storage.
Back up Microsoft 365 data directly to public clouds, including Amazon S3, Wasabi, Azure Blob, Backblaze B2) and other S3-compatible storage targets. Store backups and backup copies in different locations like local storage, cloud, S3-compatible storage, deduplication appliances, or tape to follow the 3-2-1 backup rule and avoid a single point of failure. Enable immutability for backups stored in local and cloud repositories to protect your SaaS data from accidental deletion, modification or ransomware attempts.

NAS Backup
Diverse destinations for SMB/NFS shares.
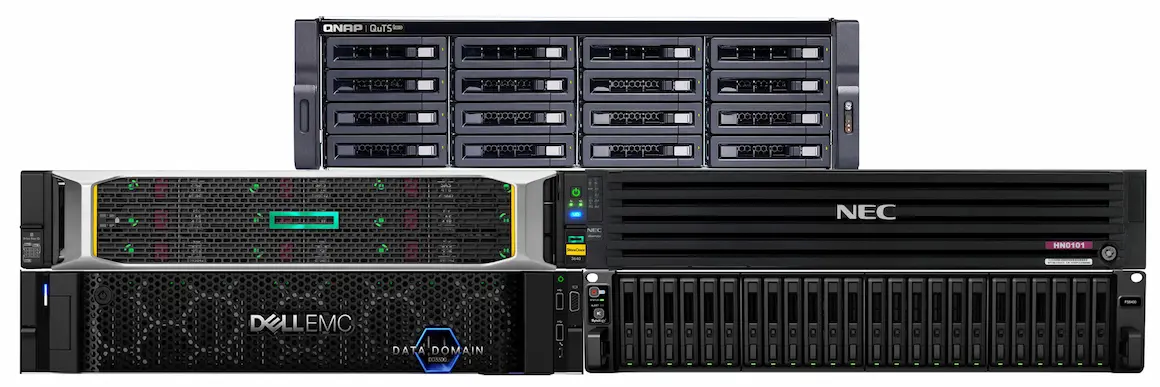
Back up SMB/NFS shares to cloud and other S3-compatible storage with immutability enabled to protect against ransomware and accidental deletion. Follow the 3-2-1 backup rule by storing backups in multiple locations, including local folders, cloud storage, deduplication appliances or tape. Optimize storage costs by leveraging cloud storage and deduplication appliances and benefit from 50% lower TCO with NAKIVO.

Backup Encryption
Higher security and compliance standards.
Protect backups from unauthorized access, exfiltration and ransomware attacks with encryption on the source side. Use AES-256 to encrypt backups, backup copies and self-backups with system configurations at the source, in transit and at rest in the repository to comply with regulations and security standards. Increase security with AWS KMS integration to ensure password loss protection. Encrypt backups sent to various destinations (local folders, cloud storage, NAS, tape).

Backup from NetApp Storage Snapshots
Fast, non-disruptive VM backups.
Back up VMware vSphere VMs hosted on NetApp storage devices directly from storage snapshots instead of regular VM snapshots. Minimize the impact on the production environment and reduce the time required to perform backup, replication and recovery tasks. Seamlessly integrate with NetApp FAS and NetApp AFF storage arrays to elevate your data management capabilities and ensure uninterrupted business continuity.

Federated Repository
Seamless expansion of backup storage capacity.
Create scalable and flexible backup repositories by aggregating multiple standalone repositories. Easily scale backup storage by adding more repository members without interrupting workflows. Ensure uninterrupted operations even if a storage device fails or reaches capacity, with backups automatically shifting to available repositories. Migrate backups across members to ensure backups are stored efficiently across the federated repository system and reduce costs associated with unused storage.

Tenant Overview Dashboard
A real-time unified view of tenants’ activities.
Get a real-time view of your entire tenant environment via the MSP Console. See the current status of existing tenants, including jobs, repositories, nodes, inventory, and allocated resources, all in one dashboard. Streamline tenant management and save time by eliminating the need to individually check each tenant for general information.
Feature Enhancements
Real-Time Replication BETA: vSphere 8 Support
Broader vSphere compatibility.
Enhance your disaster recovery and business continuity capabilities with Real-Time Replication (beta) for VMware, now with expanded support for vSphere 8 in NAKIVO Backup & Replication v11 Beta. Protect critical VMware workloads running on vSphere 8 and achieve recovery objectives as low as one second during unforeseen disasters or ransomware attacks.
Immutable Storage on NEC HYDRAstor
Secure backups in immutable storage.
Enable immutability for backup data stored on NEC HydraStor systems with the WORM (write once, read many) functionality enabled. Prevent malicious actors from encrypting or tampering with your data and ensure recoverability in case of a cyberattack. Ensure compliance with strict data retention requirements by preserving data in an unchangeable format.
How to Claim Your
Amazon eGift Cards
- Download v11 Beta and complete one or more of the following test options
to earn Amazon eGift Cards. - Proceed with any of the test options below for a $30 Amazon gift card.
- Additionally, test the Backup to Cloud for Microsoft 365 feature for
an extra $30 gift card. - Additionally, test the Backup Encryption feature for an extra $30 gift card.
- Send the support bundle indicating the option(s) you chose to
support@nakivo.com by October 31st 2024. - Share your feedback by filling out a short survey.

Important: Testing all three options (Any new feature + Backup Encryption + Backup to Cloud for Microsoft 365) will earn you a total of $90 in gift cards.
Test option 1:
Agentless backup for Proxmox VE
Add Proxmox VE hosts and clusters to the Inventory
- In the NAKIVO Backup & Replication web interface, navigate to Settings > Inventory and click + to add a new item.
- On the Platform tab, select Virtual and click Next.
- On the Type tab, select the Proxmox VE host or cluster option and click Next.
- On the Options tab, fill in all required fields, and specify the Type as either Proxmox VE Cluster or Standalone Proxmox VE host.
a. If you select Proxmox VE Cluster: Make sure the cluster is successfully discovered and a transporter is deployed in each cluster host in Nodes (Settings > Nodes).
b. If you select Standalone Proxmox VE host: Make sure the host is successfully discovered and a transporter is deployed for the Standalone Proxmox VE host in Nodes (Settings > Nodes).
- Click Finish to add the Proxmox VE host or cluster to the Inventory.
Create a backup job
- Navigate to Data Protection, click + and then select Backup for Proxmox VE to open the backup wizard.
- At the Source step, add two Proxmox VMs to back up by placing a checkmark to the left of each VM.
- Complete the backup job wizard, run the job, and make sure it is completed successfully.
- Run the Proxmox backup job again to create an incremental recovery point.
- Rerun the Proxmox backup job with Synthetic Full mode on and make sure it is completed successfully.
- Rerun the Proxmox backup job with Active Full mode on and make sure it is completed successfully.
Recovery Case 1: Full Recovery
- Go to Data Protection, select the backup job you created for the Proxmox VM, click Recover, and then Full Recovery for Proxmox VE.
- On the Backups page, select a backed-up Proxmox VM from the left pane and click Next.
- Complete the Full Recovery Job Wizard for Proxmox VE and Run the Proxmox Full VM Recovery job successfully.
- Verify that the recovered Proxmox VM is bootable by powering it on.
Recovery Case 2: Granular Recovery
- Go to Data Protection, select the backup job you created for the Proxmox VM, click Recover, and then Individual files.
- On the Backup page, select the Proxmox VM backup on the left, and then choose a Recovery Point on the right and click Next.
- Select a Recovery method:
a. Download recovered files through a browser or send them via email.
b. Recover to a server.
c. Restore them to a file share.
- On the Files page, select the files and folders you want to recover and click Next.
- On the Options page, choose one of the available recovery types and click Recover.
- Verify that the selected files and folders are recovered successfully.
Back up Microsoft 365 data to new supported repositories
Test option 2: Backup and recovery of Microsoft 365 data
- Create a new backup repository by going to Settings > Repositories > + > Create new backup repository. The Create Backup Repository wizard opens.
- At the Type step, choose any newly supported repository type (except for SaaS repository): local folder, CIFS or NFS share, cloud/S3-compatible storage, or deduplication appliance.
- At the Options step, make sure the Data size reduction option is Enabled; click Settings and make sure the Store backups in separate files checkbox is selected. Click Finish and wait for the backup repository to be created.
- Create a Microsoft 365 backup job by clicking + in the Jobs menu and then selecting Backup for Microsoft 365. The New Backup Job Wizard for Microsoft 365 opens.
- At the Sources step, add a mailbox(s), OneDrive(s), site(s) or team(s) for backup.
- At the Destination step, select the repository you created earlier.
- Configure the Schedule and Retention settings.
- Complete the Options step and click Finish & Run to run the job.
- Rerun the job to create an incremental recovery point.
- Run a synthetic full backup job for Microsoft 365 to the same repository.
- Create a recovery job for Microsoft 365 items from the repository you created (step 1). Make sure that the items are recovered successfully.
Test option 3: Backup Copy from SaaS repository to a different type of repository
- Create a Microsoft 365 backup job for mailbox(s), OneDrive(s), site(s) or team(s) by clicking + in the Jobs menu and then selecting Backup for Microsoft 365. Use the SaaS Repository type as the target at the Destination step. Complete the steps in the New Backup Job Wizard for Microsoft 365 and run the job.
- Create a new backup repository by going to Settings > Repositories > + > Create new backup repository. Complete the steps in the Create Backup Repository wizard. At the Type step, choose any newly supported repository type (except for SaaS repository): local folder, CIFS or NFS share, cloud/S3-compatible storage, or deduplication appliance.
- At the Options step, click Settings and make sure the Store backups in separate files checkbox is selected. Click Finish and wait for the backup repository to be created.
- Create a backup copy job and select the backup you just created in the SaaS repository and a recovery point at the Backups step of the New Backup Copy Job Wizard. At the Destination step, select the backup repository created in step 2.
- Once you complete configuring the backup copy job, at the Options step, click Finish & Run to run the job.
- Create a recovery job for Microsoft 365 items from the repository you created (step 2). Make sure that the items are recovered successfully.
Back up NAS/file shares to hybrid storage
Test option 4: Backup to cloud or S3-compatible storage and recover
- Prepare an SMB (CIFS) share or NFS share with different file types and folders.
- Add the file share to Inventory.
- Create a cloud or S3-compatible repository in Amazon S3, Wasabi, Backblaze B2, Microsoft Azure Blob, Amazon EC2 or other S3-compatible storage.
- At the Options step, make sure the Data size reduction option is Enabled; click Settings and make sure the Store backups in separate files checkbox is selected. Click Finish and wait for the backup repository to be created.
- Create a file share backup job:
Step 1. Source Select files and folders for backup from your share.
Step 2. Destination: Select the repository you created in step 3.
Step 3. Complete the backup job wizard and run the job. - Add more files to some of the selected folders in your share.
- Run the backup job again to create an incremental recovery point.
- Run a synthetic full backup of file share successfully.
- Create a file share recovery job of folders or individual files from the repository in Step 3.
- Run the file share recovery job and make sure the files/folders are recovered successfully.
Backup from NetApp storage snapshots
Test option 5: Create a backup of VMware VMs hosted on NetApp storage
- Add your NetApp storage device to Inventory: Setting > Inventory. The Add Inventory Item wizard opens.
- Discover your NetApp device and complete the steps in the wizard (similarly to the way HPE devices are discovered in NAKIVO Backup & Replication). Click Finish when you’re done.
- Create a VM backup job and enable Backup from storage snapshot at the Options step (under Data Transfer). Click Finish & Run to run the job.
- Verify that the storage snapshot is created on the NetApp device while the job is running.
- Create a full recovery job of the VM in the same datastore.
Federated Repository
Test option 6: Create a Federated Repository
- Create 2 backup repositories by going to Settings > Repositories, clicking the + (plus) button, and selecting Create new backup repository. The Create Backup Repository wizard opens.
- At the Type step of the wizard, choose the type of repository you want to create, for example, Local Folder.
- At the Options step of the wizard, set the Data size reduction option to Enabled and select the Store backups in separate files checkbox in the Data Size Reduction Settings popup window.
- Go to Settings > Repositories and click on the + (plus) button and select Create federated backup repository. The Create Federated Backup Repository wizard.
- At the Members step, select the 2 repositories you just created to add them to the Federated Repository.
- Create a new backup job, for example, create a VMware backup job.
- At the Destination step of the New Backup Job Wizard for VMware, select the Federated Repository as the target.
- Complete the job configuration and run a full backup.
- Run the job again to create an incremental recovery point.
- Go to Settings > Repositories and drill down into the Federated Repository. Locate the backup repository (that is, the member) where the backup was created.
- Ensure you are at the Federated Repository level. You should see the Storage widget with the list of member repositories. Hover over the repository where the backup was created, click the 3 dots (…) next to the repository name and select the Lock option.
- Switch to the Data Protection page and run the same job again. The other backup repository, which is empty and not locked, will be used as the target. A full recovery point will be created.
- Run the job again to create an incremental recovery point in that repository.
- After the backup job is completed, unlock the first repository by hovering over the name and clicking the 3 dots next to the repository name.
- Select the job and go to the Recover menu.
- Choose the incremental recovery point created in the first repository. Run a recovery of the VM. Recovery should be successful, and the recovered VM data should correspond to the selected point in time.
Additional Test Options: Backup encryption
Test option 7:
- Create a backup job and enable encryption at the Options step of the wizard (without enabling AWS Key Management Service).
- Run the backup job several times to create full and incremental recovery points.
- Go to the backup repository, and verify that the backup object and recovery point(s) are encrypted.
- Create a file-level recovery job from the encrypted backup object and run the job.
Test option 8:
- Create a backup job and enable encryption at the Options step of the wizard (without enabling AWS Key Management Service).
- Run the backup job several times to create full and incremental recovery points.
- Go to the backup repository, and verify that the backup object and recovery point(s) are encrypted.
- Reinstall NAKIVO Backup & Replication and add the existing repository or add it to another NAKIVO Backup & Replication deployment.
- Go to the backup repository and provide the password for a recovery point.
- Create a full recovery job or a file-level recovery job from this recovery point. Verify that the VM or file has been recovered successfully.
Test option 9:
- Create a backup job and enable encryption at the Options step of the wizard. Enable the AWS Key Management Service by going to Settings > General > System Settings > Encryption tab.
- Run the backup job several times to create full and incremental recovery points.
- Go to the backup repository, and verify that the backup object and recovery point(s) are encrypted.
- Reinstall NAKIVO Backup & Replication and add the existing repository or add it to another NAKIVO Backup & Replication deployment.
- Discover the same AWS account that has the encrypted KMS key.
- Go to the repository and verify the password column of the backup object. Recovery points will be available.
- Create a full recovery job or a file-level recovery job from the latest recovery point. Verify that the VM or file has been recovered successfully.
Real-Time ReplicationBETA for VMware
Test option 10: Create a real-time replication job for VMware vSphere 8.
Before proceeding with configuring a real-time replication job for a VM, ensure that the following prerequisites for the source and target hosts are met:
- Make sure you run the Beta test on VMware vSphere 8.
- Source hosts.
Install the I/O Filter tool in the VMware host cluster (on the source host). For details, refer to the Installing I/O Filter page. (Make sure you remove any previous I/O Filter configurations before installing the new I/O Filter bundle to support ESXi 8.0 U2)
Note: To allow the I/O Filter to process the source VMs you want to replicate, create a VM storage policy and specify NAKIVO I/O filter as the provider within the policy. For details, refer to https://beta-helpcenter.nakivo.com/User-Guide/Content/Settings/Nodes/Configuring-Nodes/Installing-IO-Filter.htm#Creating.
- Target hosts.
- Deploy a NAKIVO Backup & Replication node (Transporter) as a VMware vSphere Appliance on the target ESXi host for the replica VM. If the target host is part of a host cluster, deploy the Transporter on at least one host in the cluster. The replica and Transporter should be located on the same datastore(s) so that the Transporter can operate replica disks in Hot Add mode. For details, refer to the Deploying Transporter as VMware Appliance page.
- To run real-time replication jobs to the target ESXi host, you need to install the Journal Service module on the VMware vSphere Appliance deployed in Step 1. For details, refer to the Installing the Journal Service page.
Create a VMware vSphere Real-Time Replication Job
- On the Jobs dashboard, click + > Real-Time ReplicationBETA for VMware.
- The New Real-Time ReplicationBETA VMware Job Wizard opens. Complete all the steps: Source, Destination, Networks, and Re-IP.
- On the Retention page, set the Journal history limit to 1 hour and, optionally, the Journal size limit to 1 GB.
- On the Options page, make sure the VMware vSphere Appliance node is chosen as the target transporter.
- Once you complete the wizard, run the Real-Time replication job.
- Wait until the initial real-time replication job run is completed. You will see an RPO value of 0 on the Virtual Machine widget.
- Add/change data on the source VM for 5 to 10 minutes until the RPO value exceeds 0 as shown in the Virtual Machines widget (under Manage).
- Create a Real-time replica failover job by clicking Recover > VMware Full Recovery > Real-Time Replica Failover Beta.
- On the Source page of the wizard, choose the recovery point you would like to revert the replica VM to.
- Run the failover job.
- After the job is completed, log in to the replica VM and verify that the changes made on the source VM are present on the replica VM.
Tenant Overview Dashboard
Test option 11:
- Deploy NAKIVO Backup & Replication in the single-tenant mode (Director + Onboard transporter + Onboard local repository).
- Deploy NAKIVO Backup & Replication in the multi-tenant mode.
- Log in to NAKIVO Backup & Replication installed in the multi-tenant mode.
- On the Dashboard, click Create New Tenant and select New remote tenant.
- Follow the steps in the Remote tenant creation wizard.
- On the tenant’s standalone deployment of NAKIVO Backup & Replication, go to Settings > General > MSP, and click + (add) in the top right corner to add an MSP.
- Enter the master tenant’s hostname or IP address and the port number. Also, provide the remote user credentials created on the master tenant side.
- A popup with certificate details appears. Click Apply to add the MSP. The MSP and the remote tenant are successfully connected.
- Add an ESXi host, for example, to the inventory and run a VMware backup job on the tenant’s standalone deployment.
- Switch to the Multi-tenant instance of NAKIVO Backup & Replication.
- Verify that the Summary bar on the Dashboard shows 1 tenant, 1 job, 1 node, 1 repository, 1 ESXi host, and 1 activity for the running job.
- Ensure that the Tenants widget shows the “good” status for the remote tenant and other items, and accurately displays the amount of available and used space in the remote tenant repository.
- On the tenant’s standalone deployment, detach the repository and re-run the VMware backup job. This time, the job should fail, and you should see an alarm appear in the Summary bar.
- Additionally, click on the Tenant name> Repository Status, and check the Issues at the top of the dialog box – You should see the repository detachment notification.
- Switch to the Multi-tenant instance and navigate to the Dashboard.
- Check that the Summary bar shows 2 issues in total, with 1 related to Jobs and the other to Repositories.
- Ensure that the Tenants widget displays an “Error” status and “Error” under the Job and Repository items.
- Confirm that the alarm and notification are visible within the Events widget.