How to Join vCenter to an Active Directory Domain
Integrating a vCenter Server Appliance (VCSA) with Microsoft Active Directory as the identity source simplifies and improves the security of access management. By joining vCenter to an AD domain, VMware vSphere administrators can use the same identity source used to grant access to file servers and other resources on the network to grant access to vSphere objects. Read on to learn the steps for how to join vCenter to domain.
How to Add vCenter to an Active Directory Domain
Active Directory is a common standard for the centralized authentication of users in many organizations. Active Directory can also be used to authenticate VMware ESXi and VMware vCenter users. Then we can assign the needed vSphere permissions for authenticated Active Directory domain users.
Requirements
There are some requirements for configuring vCenter AD integration:
- An Active Directory domain controller must be configured. The domain controller must be writable (and not just in read-only mode).
- The DNS suffix used for a fully qualified domain name (FQDN) of the vCenter Server must be correct.
- The DNS settings of VCSA to communicate with the domain controller must be correct.
- vCenter Server Appliance (VCSA) must resolve the DNS name of the Active Directory domain controller to an IP address.
Note: It is also possible to join a standalone ESXi host to the AD domain.
How to join vCenter to domain
We need to join our VCSA appliance to Active Directory as an object in order to enable Active Directory (Integrated Windows Authentication). This option allows us to pass the logged-on user’s Windows credentials as authentication to the vCenter Web Client. Note that in this tutorial, we are using vCenter Server Appliance 7.0 with an embedded platform service controller.
Complete the following steps to set up the AD connection:
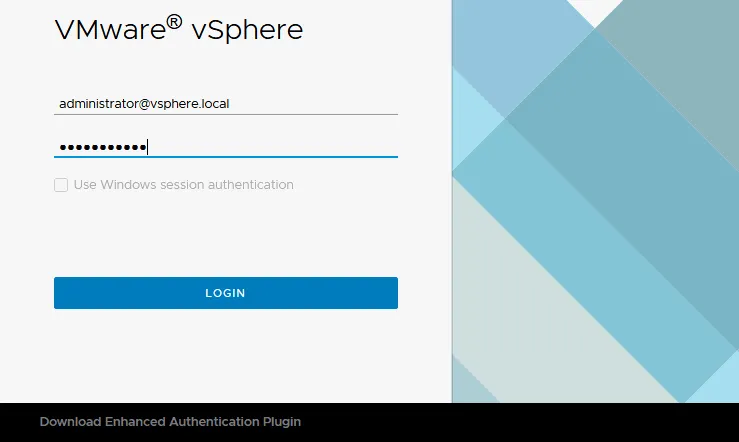
- Log in as the SSO administrator to vCenter by using a web browser and going to the VMware vSphere Client page. The default administrator name is administrator@vsphere.local (covered in a previous post on vSphere SSO domain), which is the admin user set up during VCSA installation. Also, keep in mind, this is not a Windows Active Directory domain user. However, you can use the Use Windows session authentication option when you integrate vCenter with Active Directory.
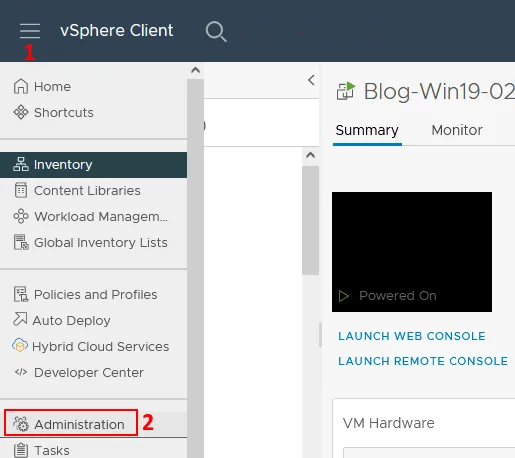
- Once you are logged in to the Web Client as the SSO administrator, click the menu icon in the top left corner. Click Administration in the menu that opens.
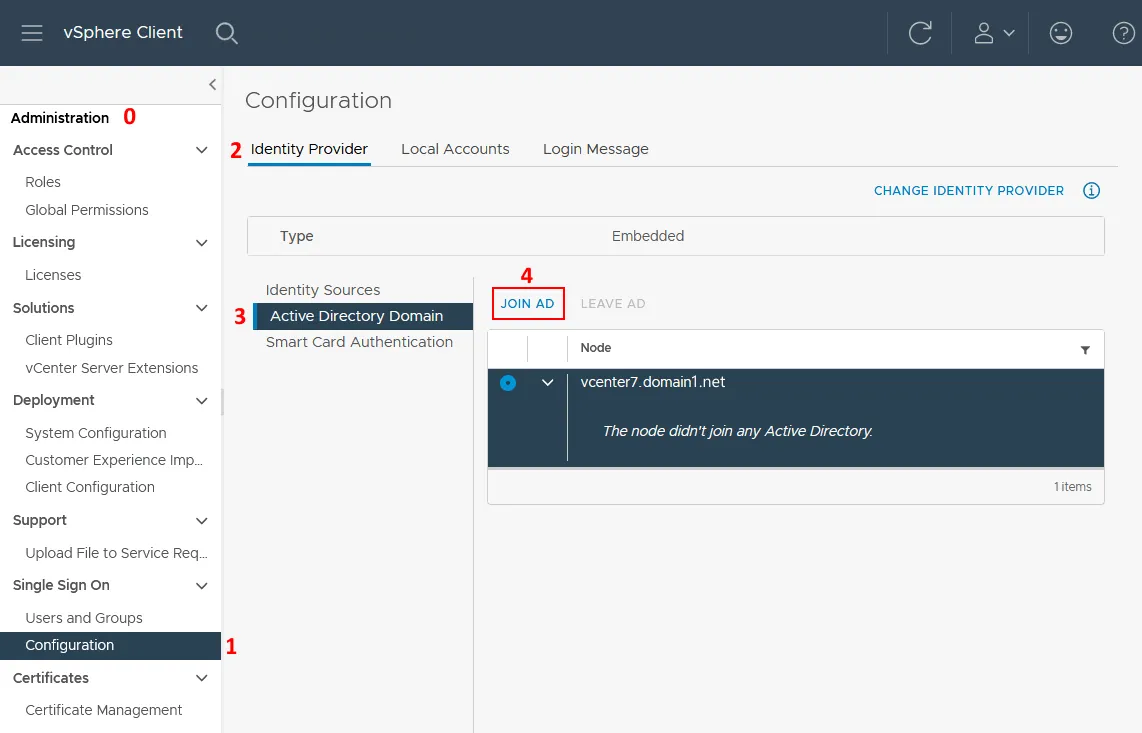
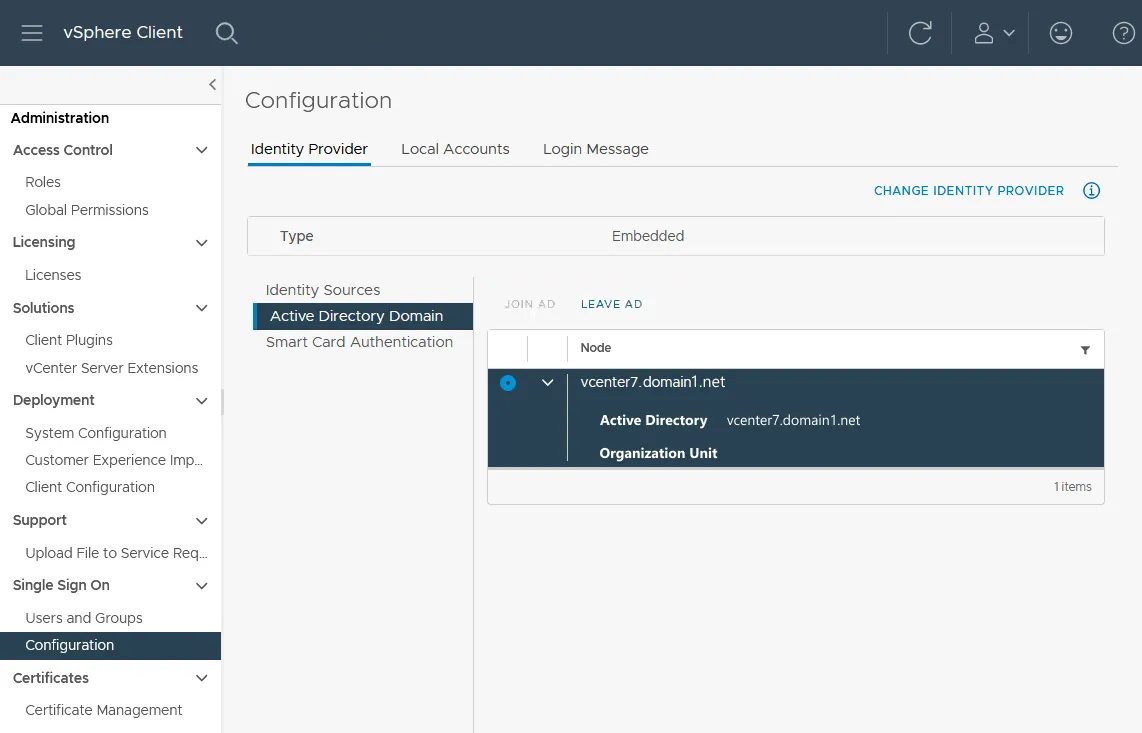
- Click Configuration on the Administration page in the Single Sign On section. Select the Identity Provider tab, click Active Directory Domain, and click JOIN AD to join vCenter to domain.
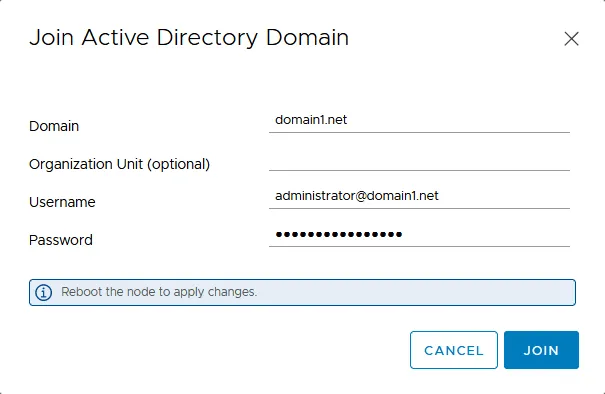
- This will bring up a dialog box to type in the Domain, Organizational unit, Username, and Password.
- Enter the Active Directory domain name, for example, domain1.net. Note that the name of your existing local SSO domain (vsphere.local in our case) and the Active Directory domain (domain1.net in our case) must be different. If you use the same AD domain name, you get an error and won’t be able to join the domain and integrate vCenter with Active Directory.
- Setting an organization unit can be useful for those who are familiar with LDAP. If the Organization unit field is left empty, then a computer account in AD is created in the default location, which is a Computers container. You can always move a computer object to the needed organization unit on your Active Directory domain controller. An example of how to fill the Organization Unit field:
OU=Unit1,DC=domain1,DC=net - Enter the username of the Active Directory domain administrator and the password. Our domain administrator is administrator@domain.net. However, you can create a dedicated user (for example, vmwareadmin) on the domain controller and add this user to the appropriate domain administrators group.
After completing the dialog box, click Join and you will be prompted to reboot your vCenter appliance.
Note: If you see an error like:
Idm client exception: Error trying to join AD, error code [11], user [domain1/administrator], domain [domain1.net], orgUnit[]
try to run the following command in the VCSA console shell (command line) as root with your domain name and domain administrator name:
/opt/likewise/bin/domainjoin-cli join domain1.net administrator - To reboot vCenter server from the interface of VMware vSphere Client, go to Administration > System Configuration, select your vCenter node, and click Reboot node.
Alternatively, you can log in to VMware Host Client of the ESXi host on which the vCenter Server Appliance VM is running and reboot the VCSA VM. Another solution is to use the Direct Console user interface (DCUI) on the VCSA and use the Reboot option there.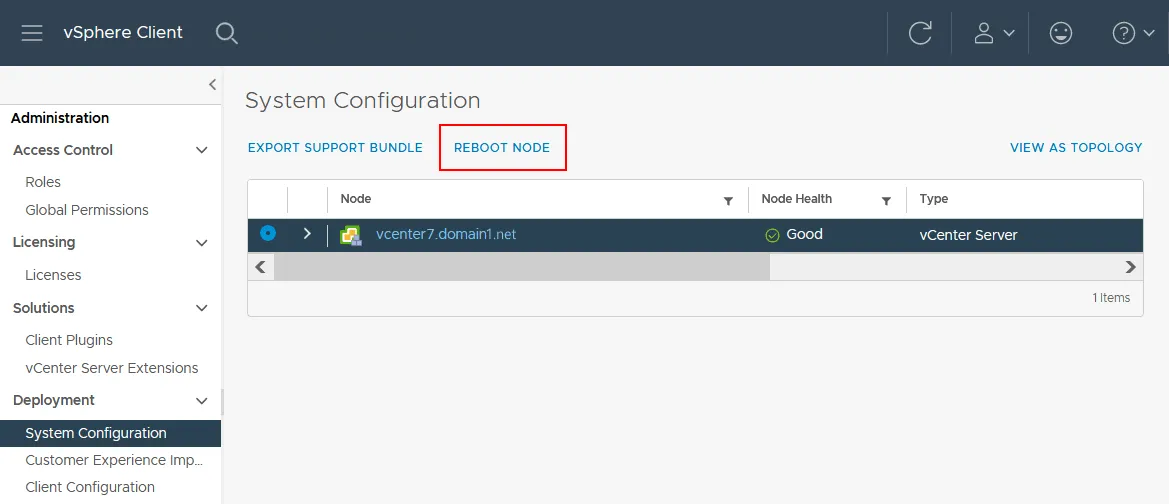
- After the vCenter reboot, you can go to Administration > Single Sign On > Configuration > Identity Provider > Active Directory Domain (as you did earlier) and ensure that connecting to domain controller is successful and your vCenter is a domain member now.
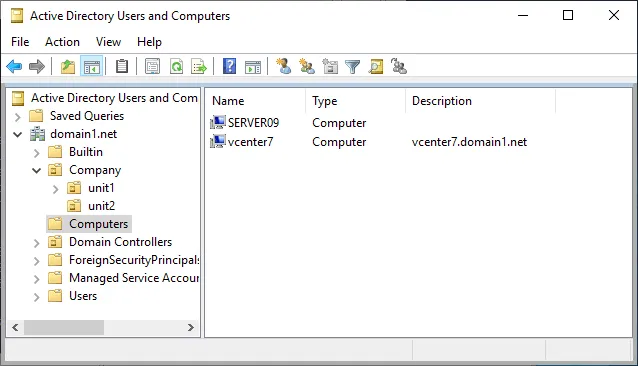
- You can also ensure that your vCenter machine has joined the domain in Windows Server acting as a domain controller. For this purpose, open Active Directory Users and Computers, select your domain, and click Computers. You can see that our vcenter7 machine is a member of our Active Directory domain in the screenshot below.
Adding the identity source
After the vCenter Server Appliance (VCSA) has been joined to the domain and rebooted, we are now ready to add our Active Directory identity source:
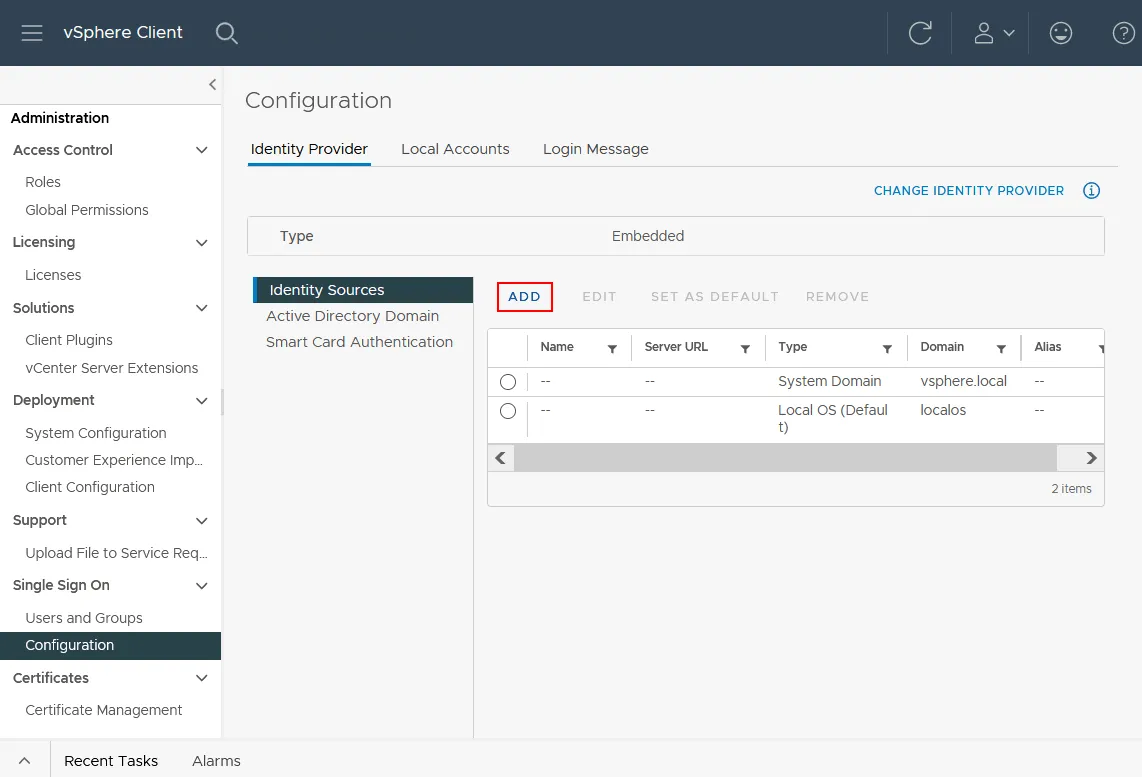
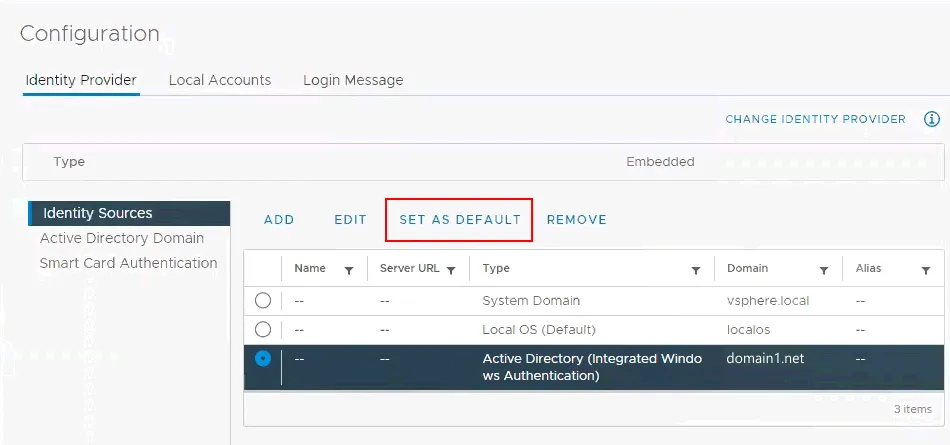
- Go back to Administration and click Configuration under the Single Sign-On menu. Click the Identity Sources in the Identity Provider tab and then click the ADD button to add an identity source.
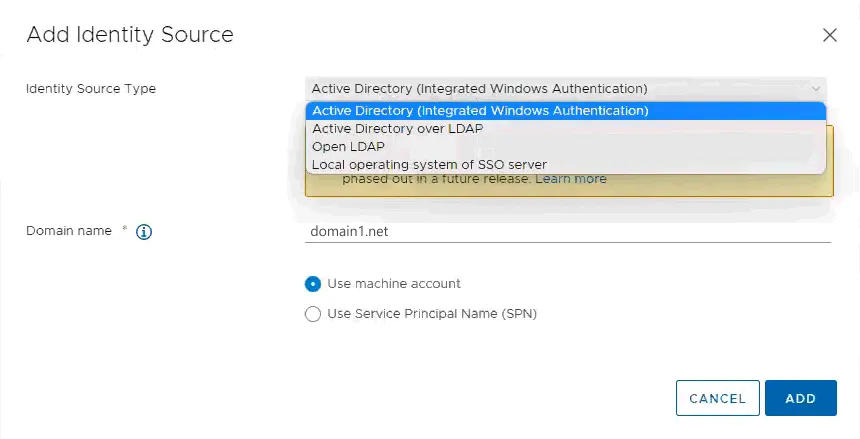
- We select the Active Directory (Integrated Windows Authentication) option. Now that we have joined our vCenter to the domain, the Domain name field is automatically populated with our domain name. We can leave the Use machine account as the default option here. Finally, complete the configuration of the identity source and click Add.
- Now, under the identity source, we can see our domain. You can click Set as default to use this Active Directory domain by default.
Then you can create Roles in vCenter and assign privileges to those roles and then attach a role to an Active Directory user.
Conclusion
Having a centralized system for user authentication in your environment and using Active Directory for vSphere user authentication is useful in many situations. Make sure to back up your Active Directory domain controller and vCenter Server appliance regularly to avoid downtime and issues caused by the inability to authenticate users and manage the infrastructure. NAKIVO Backup & Replication is a complete data protection solution for VMware vSphere environments. Use the solution to back up your VMs and applications like Microsoft Active Directory.